Jul
30
2018
WHAT IS IT?
Reduced to its essence, the Lacie DJI CoPilot is a 2TB battery-operated drive with an SD reader. This may sound unimpressive, as SD card/drive combos have been attempted in the past. Yet Lacie, in partnership with DJI, didn’t just create a backup drive but rather a complete solution for creatives on the go. Let me explain what this means and how the CoPilot solved one of my major workflow issues as a photographer.
Lacie calls the CoPilot a BOSS (Backup On-Set Solution), as it can copy data from multiple sources without a laptop. The words “without a laptop” are key. You can plug in your camera or drone, hit a button, and pull off the media. SD card, no problem. Micro SD, no problem. Lacie even provides a micro SD to SD adapter right in the box.
Second, and here’s where the CoPilot distinguishes itself from other SD reader drives, you can connect the drive to your phone or tablet to review your content using the CoPilot App (Lacie provides Lightning as well as mini- and micro-usb cables in the box).
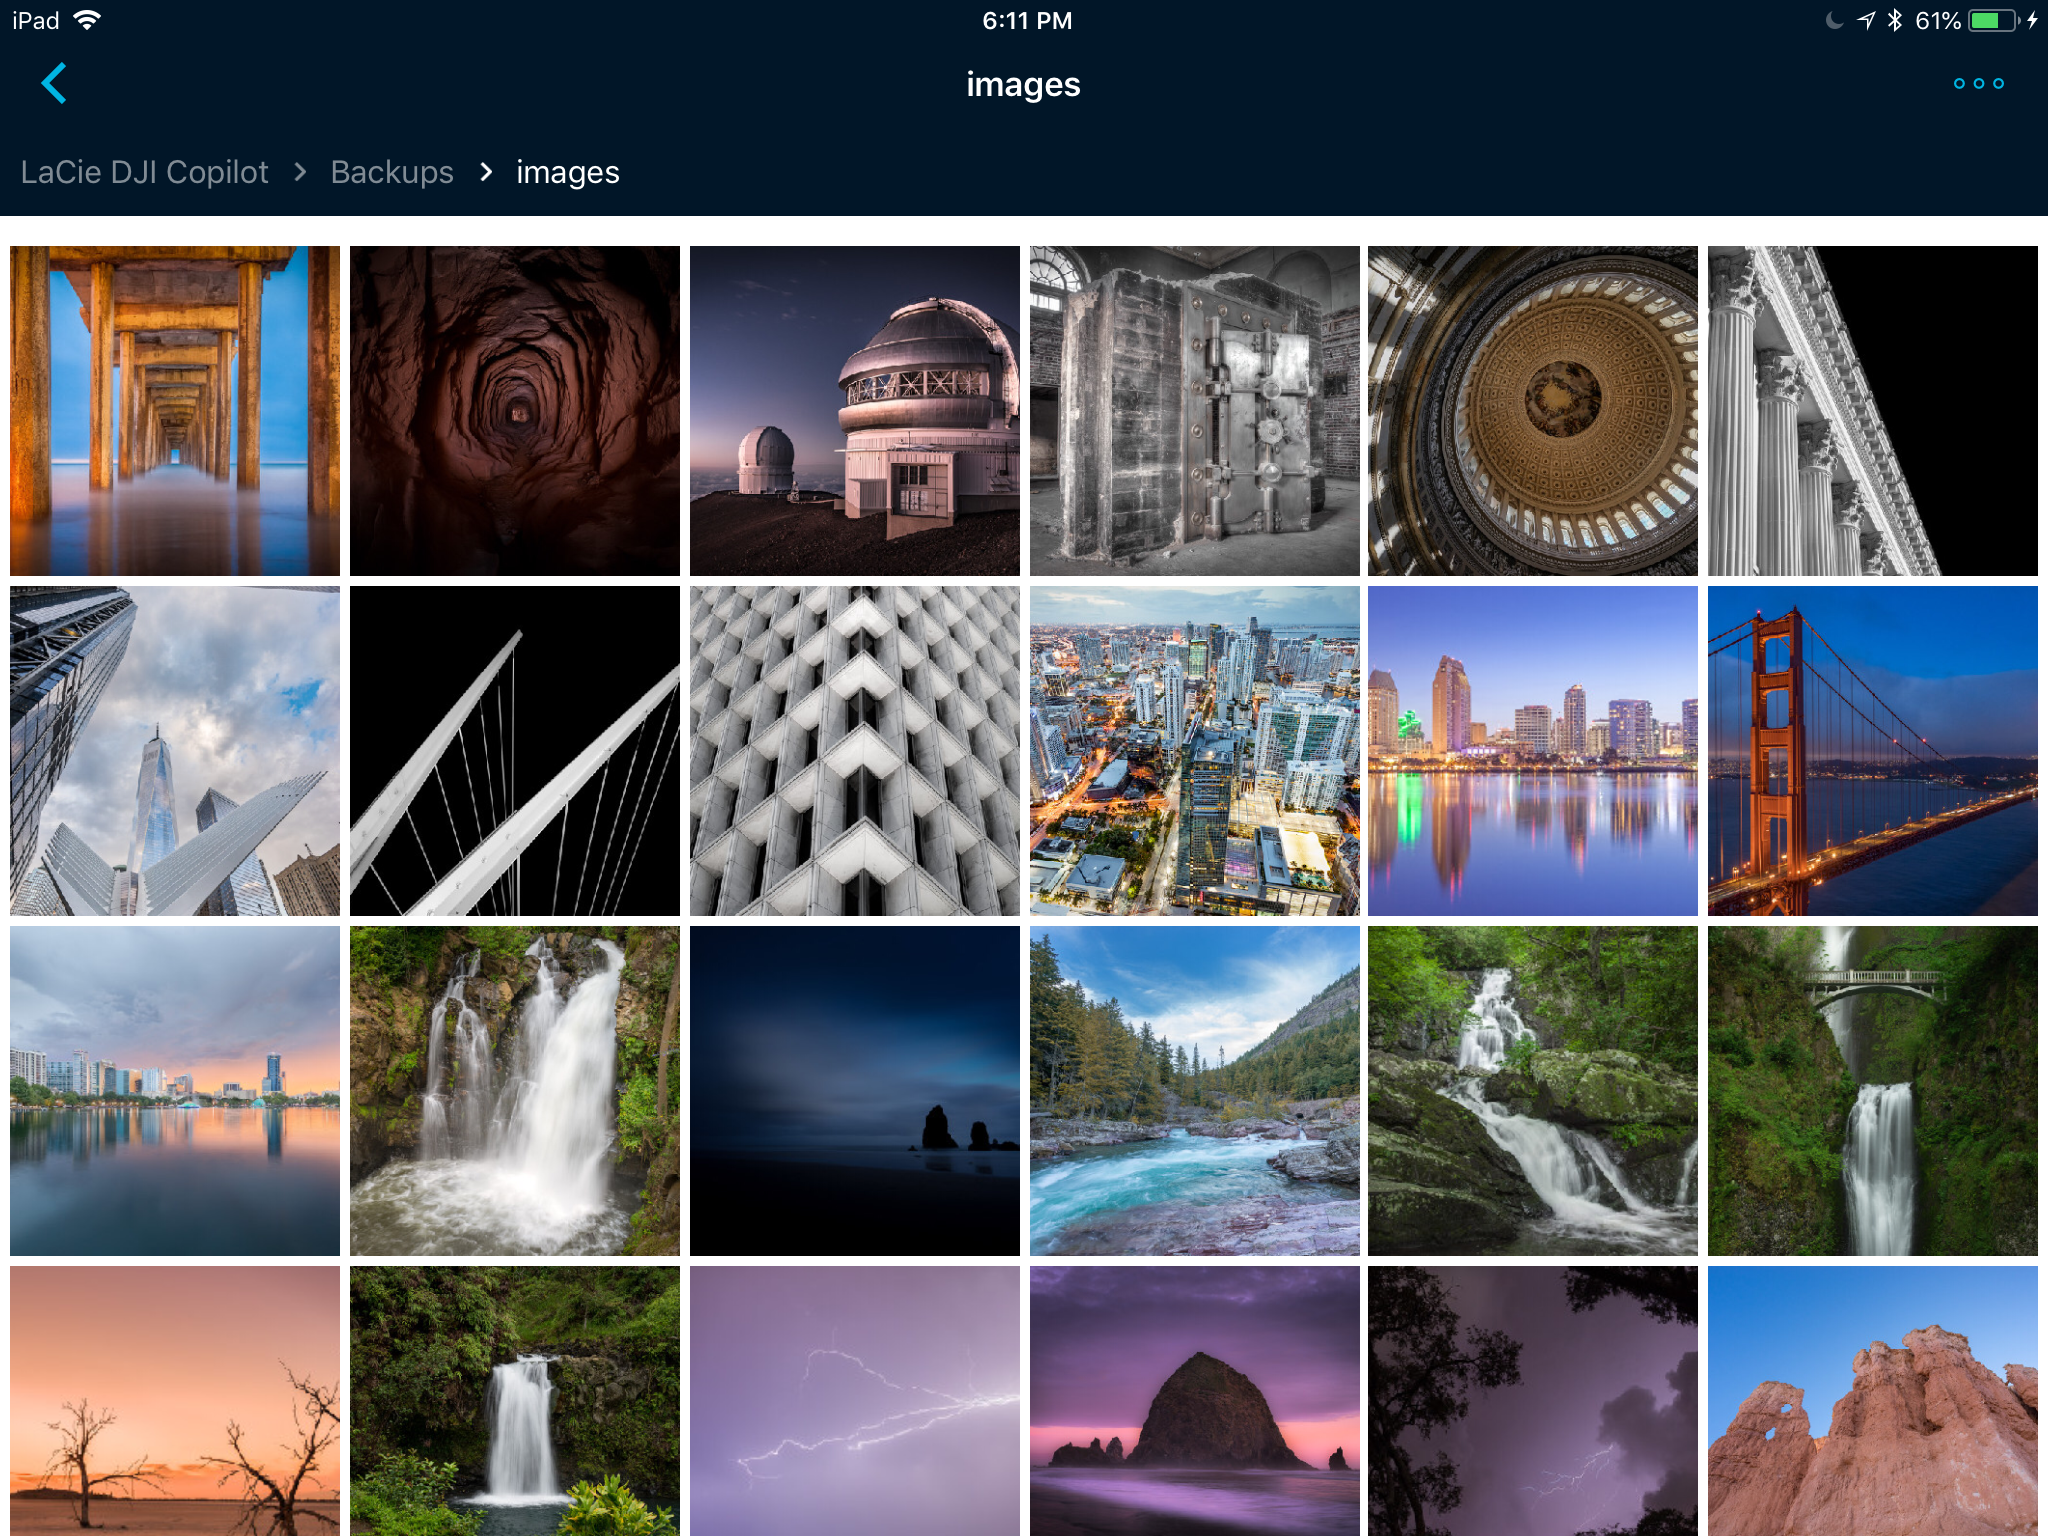
Viewing images on the CoPilot App
Also, and critically for me, you can use the CoPilot to directly import images into Lightroom Mobile on an iPad. This is huge as in the past, I would have go through the following steps to get images into Lightroom mobile:
- Connect Apple’s Lightning-to-SD card reader and insert the SD card
- Import the images into the camera roll
- Import the images into the Lightroom mobile from the camera roll
- Delete images from the camera roll
This was a highly time-consuming process that tied up the iPad during import (heaven forbid there was a hiccup that required going back to square one) and was a major pain point for me while traveling in Hawaii for two weeks. I was jumping from island to island, shooting every day, and needing to review/upload images while on the go. Also, I was already carrying multiple cameras, lenses, and tripods, a DJI Mavic Pro, two iPads, and going through airport security a couple of times a week. I didn’t want or need the extra weight of a laptop.
With the CoPilot, I can now copy the SD card onto the drive, plug in my iPad, and directly import the images into Lightroom Mobile without having to go through the camera roll first. The process is faster and also frees me from having to store all the images on my iPad. I can just pull off the photos I want to edit and have Lightroom Mobile sync them back through the cloud to my laptop. The rest can later be copied directly from the drive to my laptop’s Lightroom catalog.
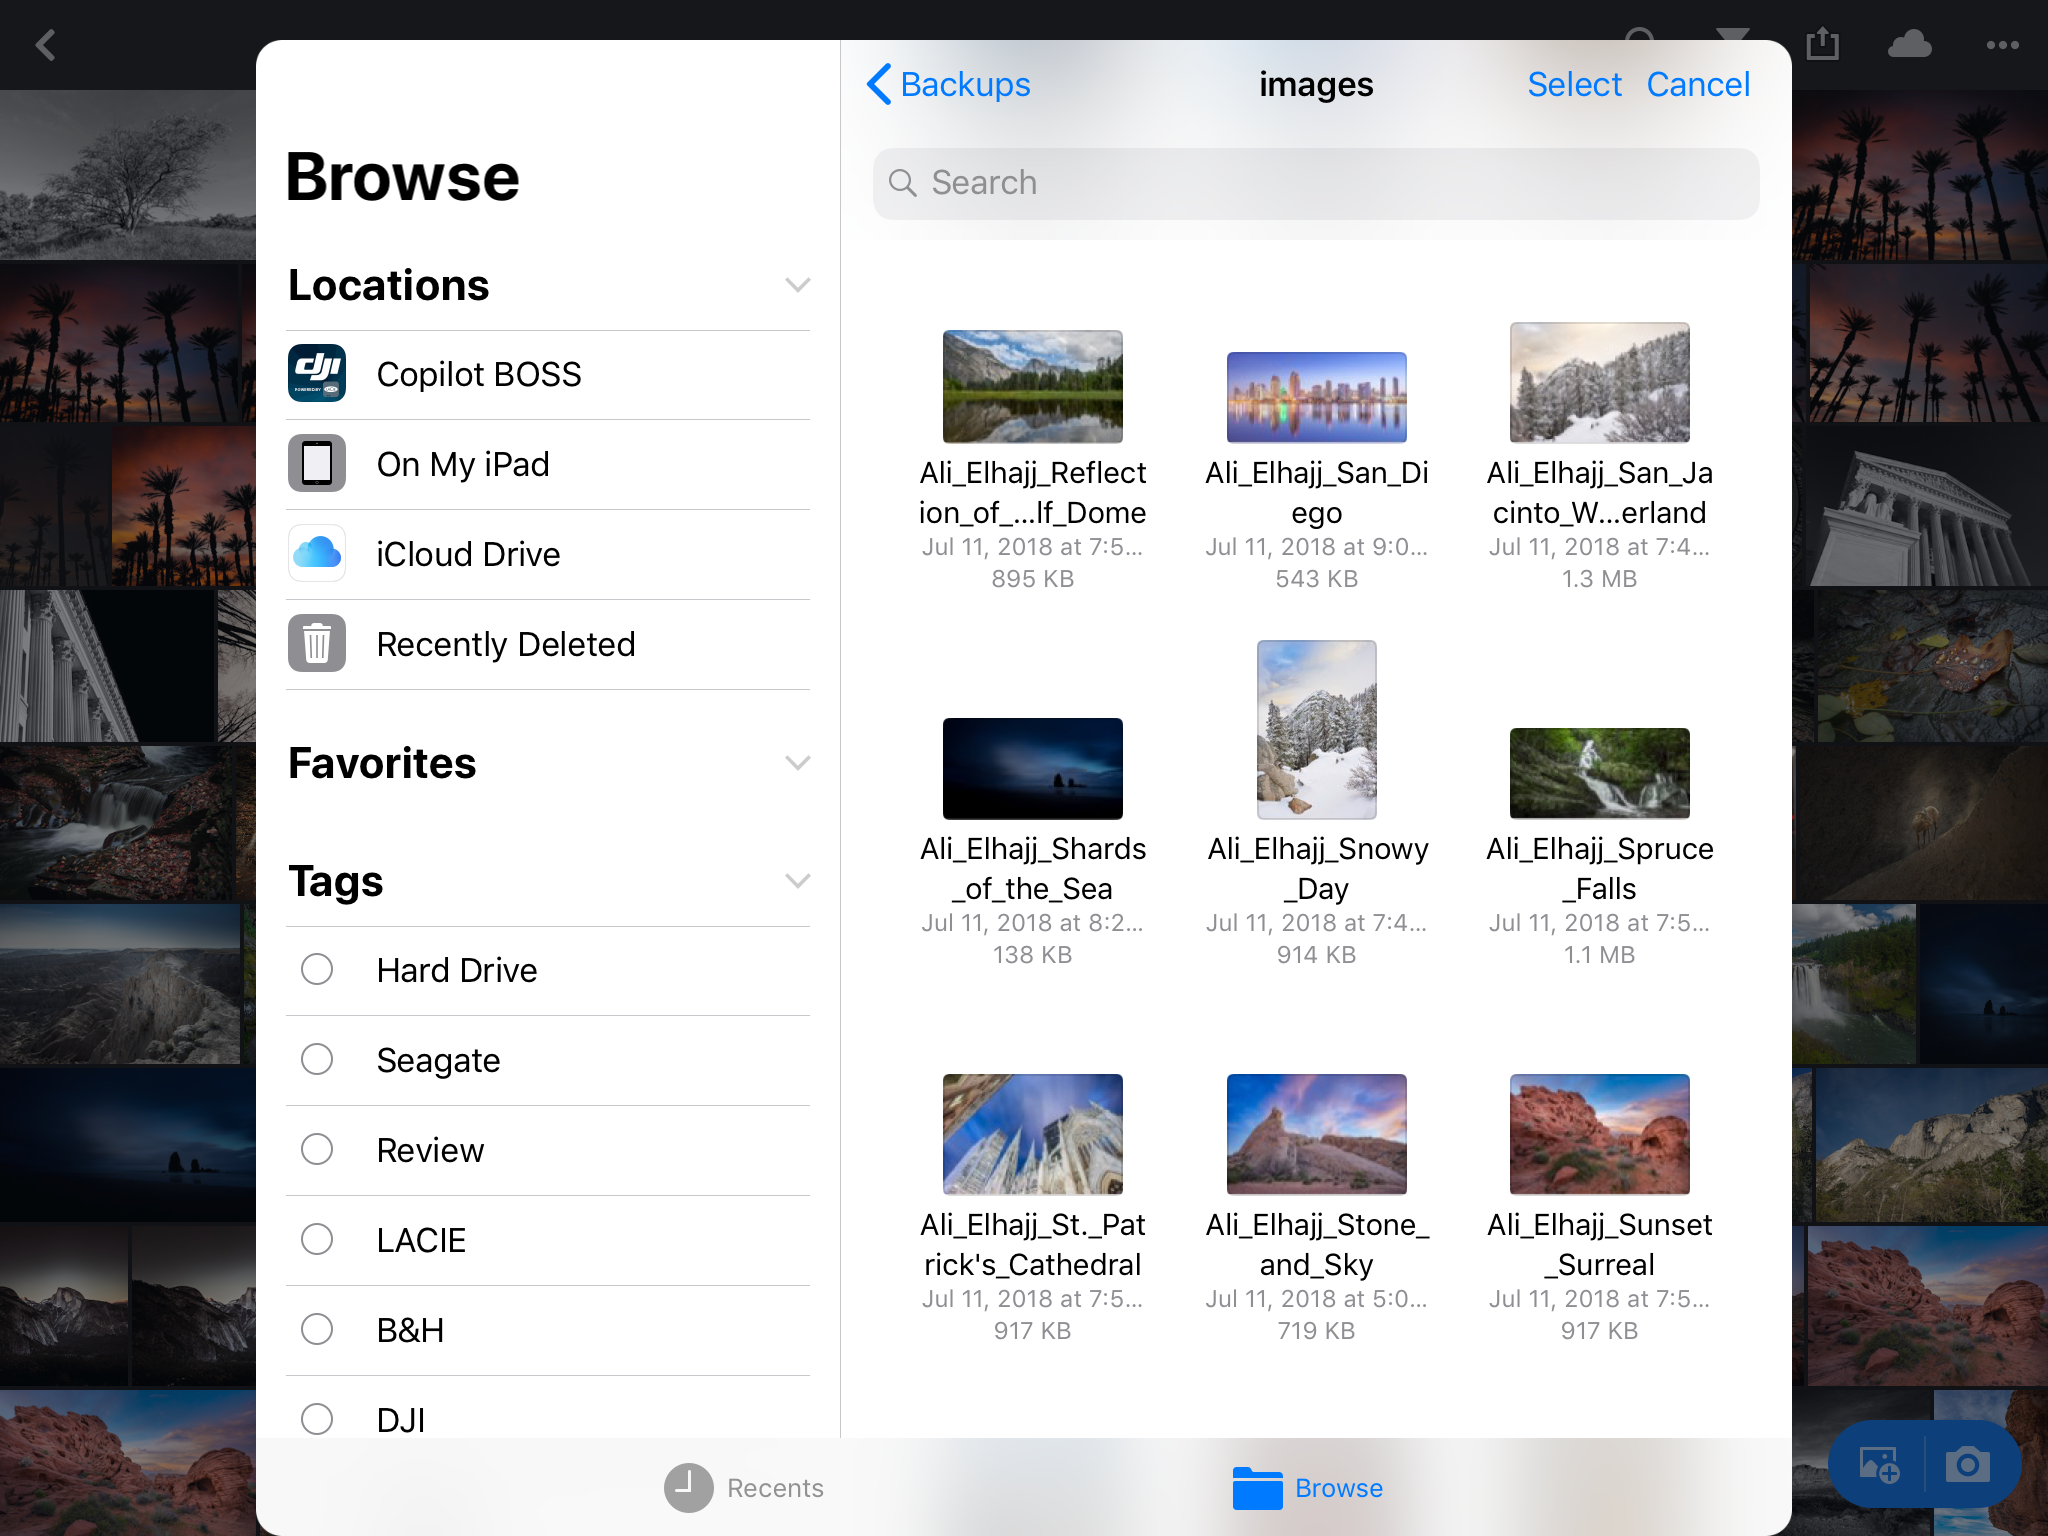
Importing directly from the CoPilot to Lightroom Mobile
This is exactly what I did when I took the drive with me while sailing the Alaskan Inside Passage.
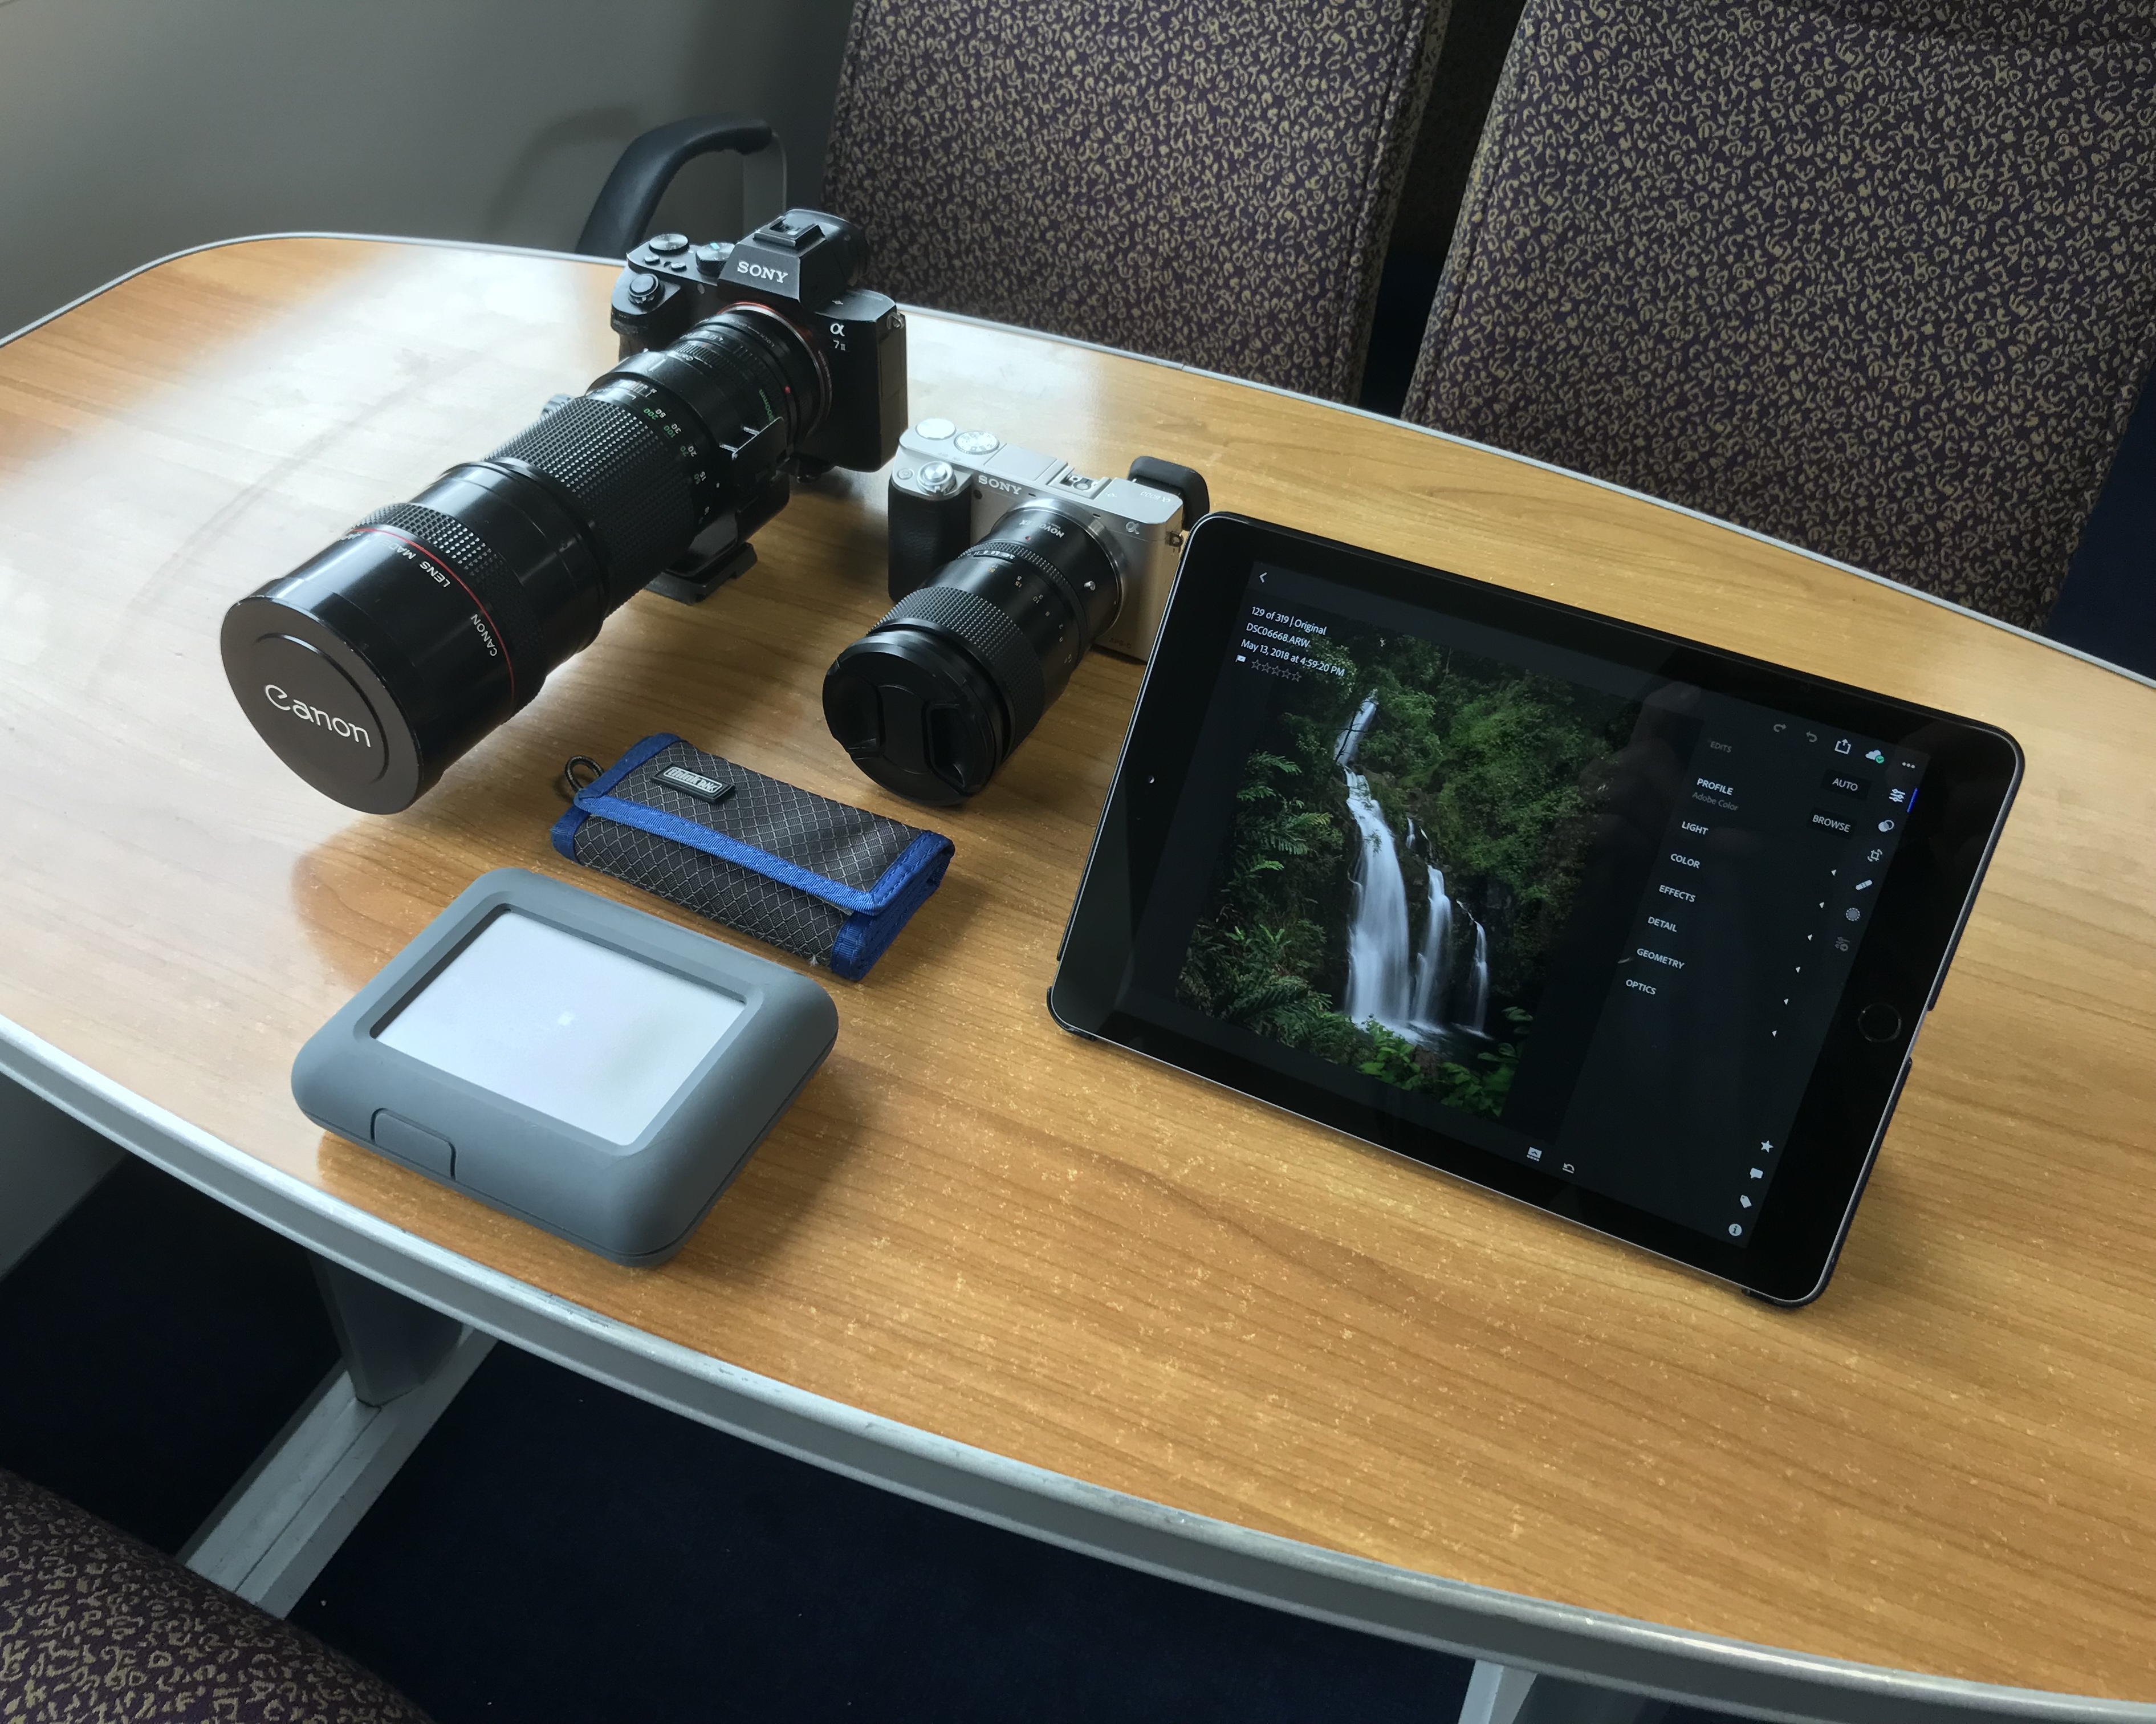
Editing Hawaii photos while traveling the Alaskan Inside Passage
Another advantage of using the CoPilot is reducing import time into Lightroom CC Classic. Reading from a drive is a lot faster than reading from an SD card. You can argue that I still spend the time reading the card. However, it’s not a big deal to drop the card in the drive, walk away, and come back after the copy has completed compared to waiting for a full Lightroom import from an SD card.
DESIGN
If I had to describe the CoPilot in one sentence, I would say it is a ruggedized drive that’s thicker than your typical backup disk.
The CoPilot is a drive designed to be on the go, and it shows. Weighing 1.18lbs and measuring 5.35” long x 4.37” wide x 1.41” high, it is shock- and drop-resistant with a rubberized outer layer. Though it has some heft to it, it doesn’t feel heavy.
The status screen on the top of the CoPilot is a nice touch that allows for monitoring of transfer status, remaining drive capacity, and battery level. A single click while the drive is off, for example, will give you a readout on capacity and battery level.
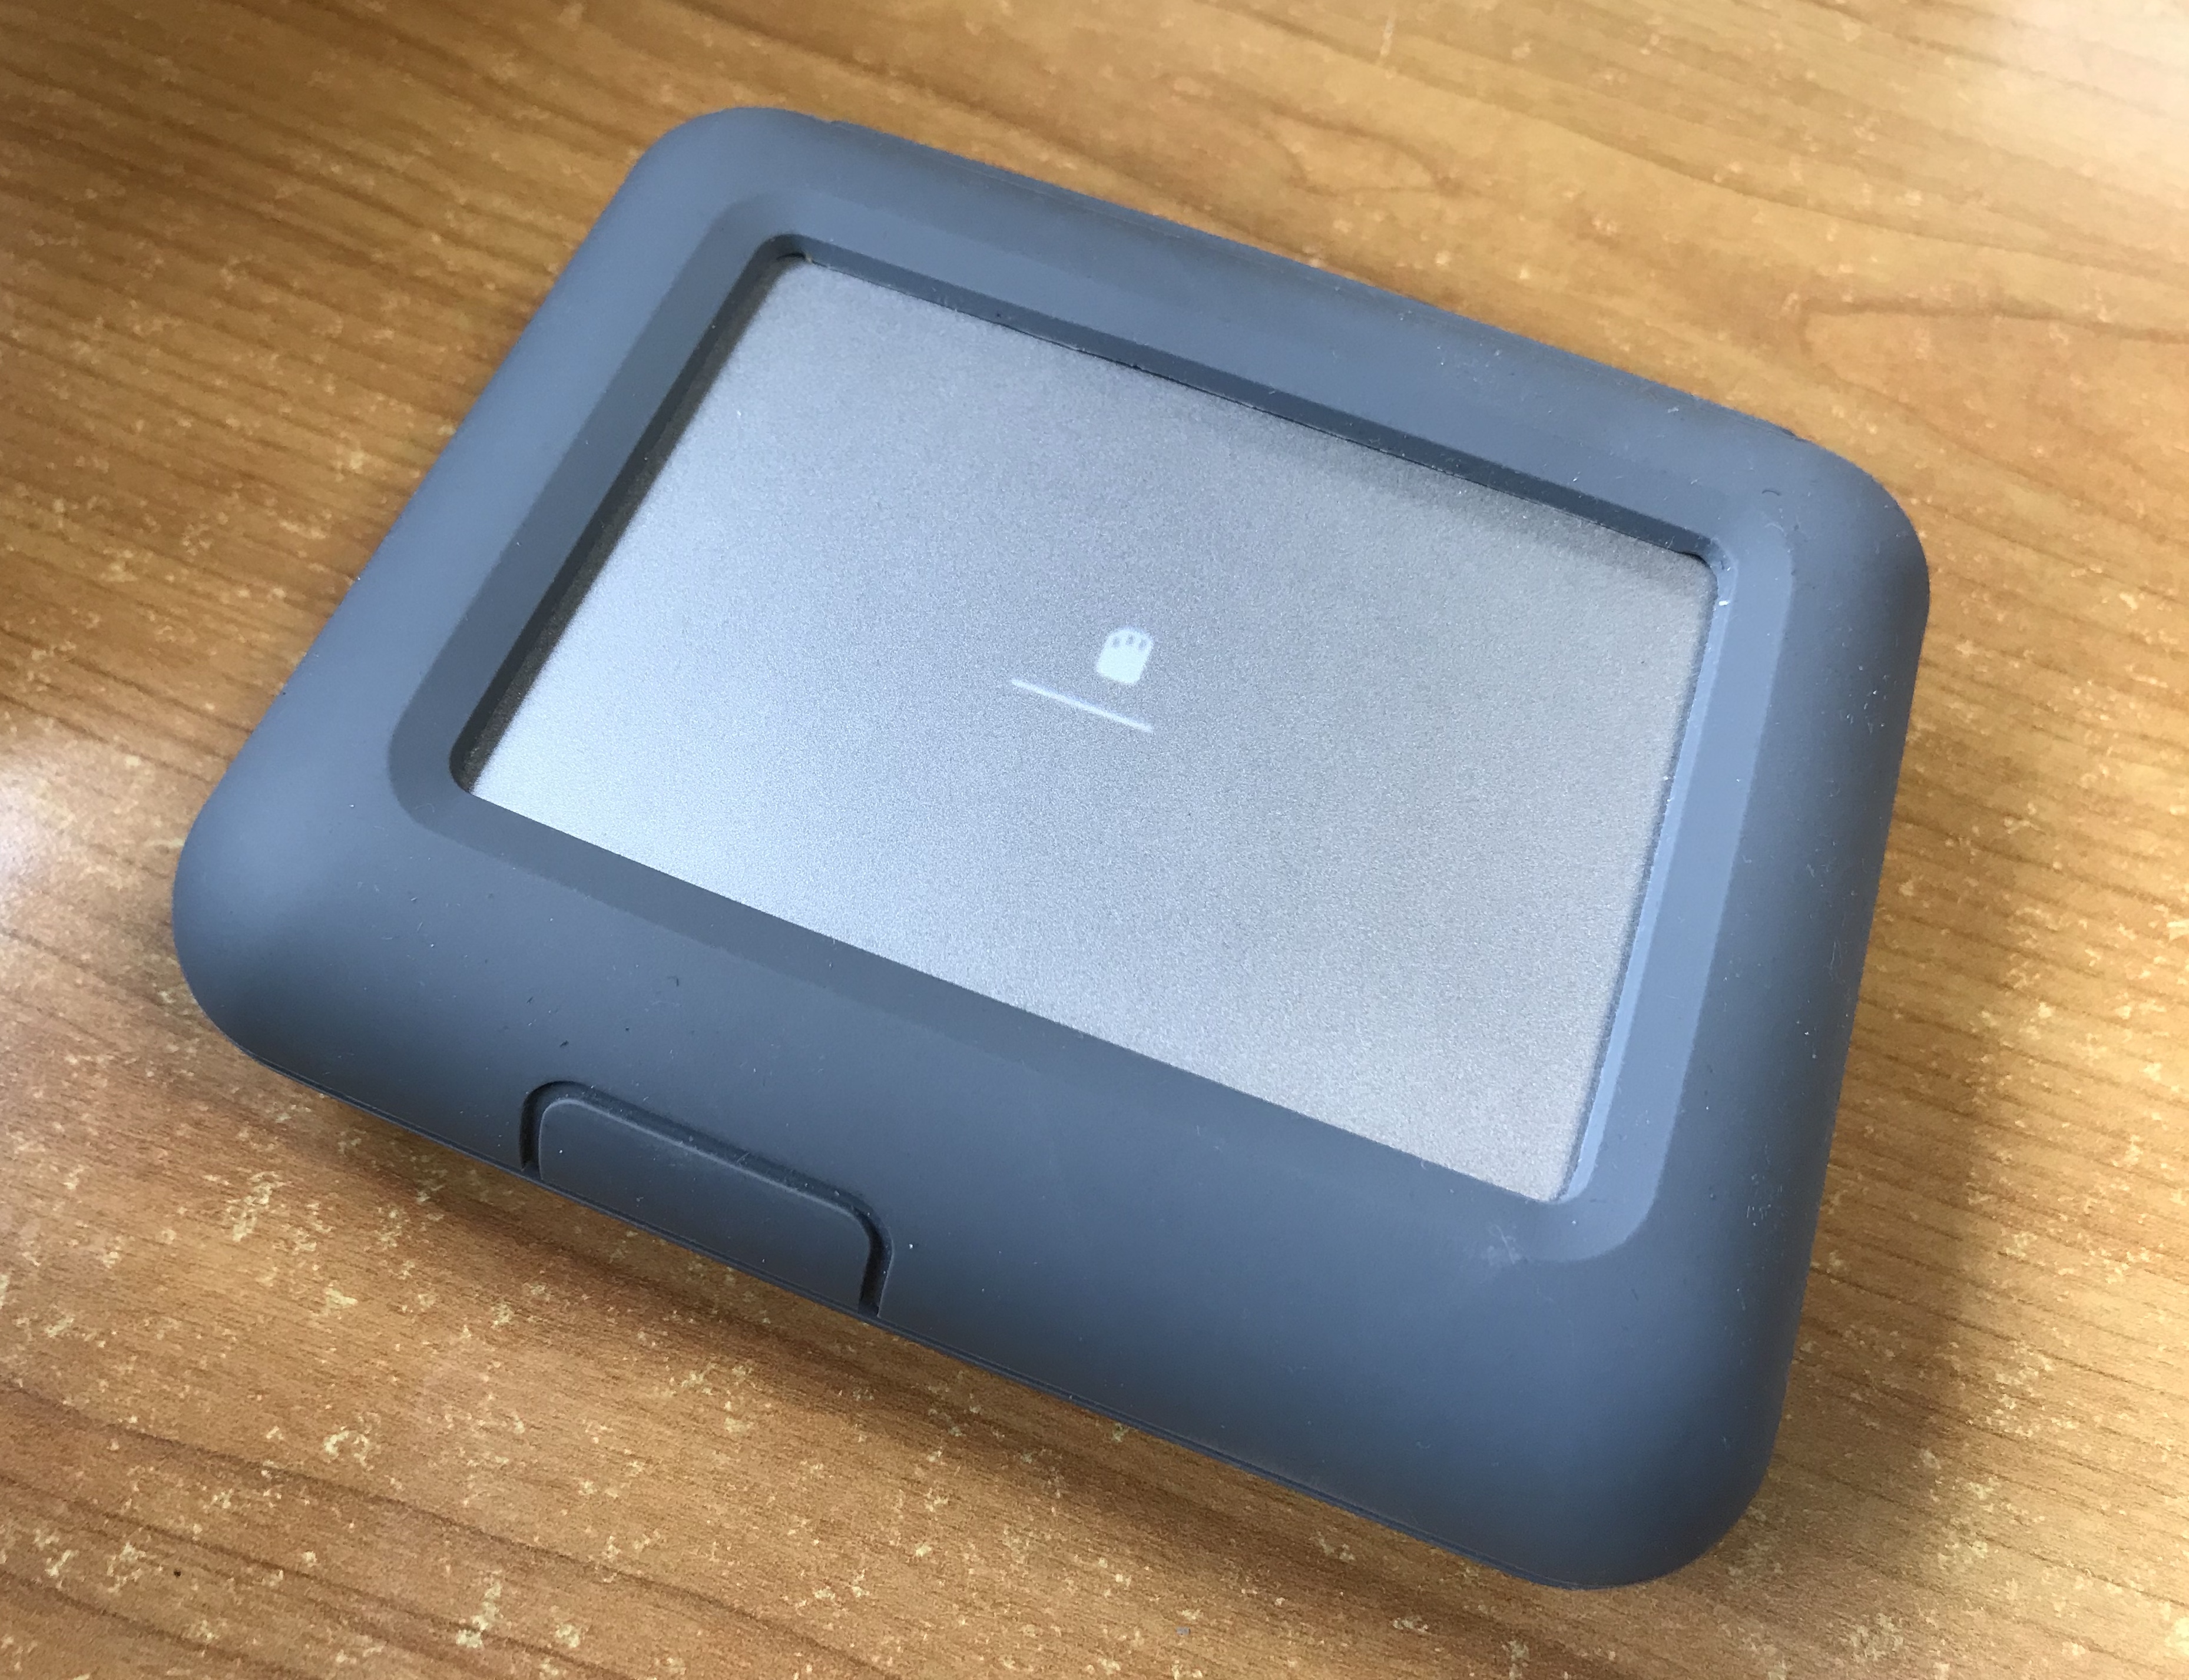
The screen tells you what the drive is doing at all times.
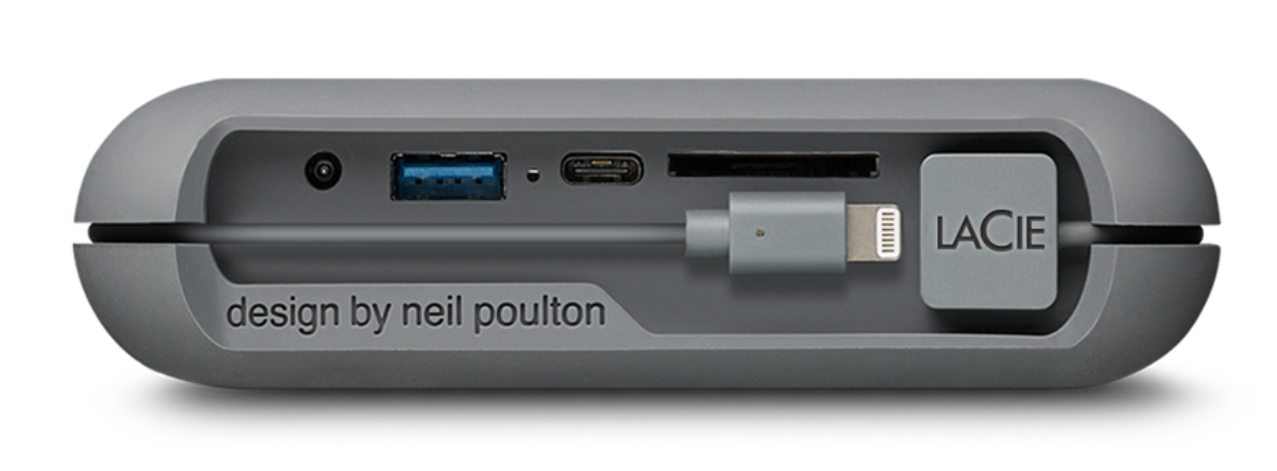
The back of the drive houses the interfaces, including the power plug, SD card reader, and plugs for USB-A and USB-C. Lacie included a removable rear cover, allowing for all the interfaces to be hidden and protected while in transit.
USING IT
Using the CoPilot is simple. Insert your card or plug in your device; then click the one and only button on top of the drive. From there, a short button press tells the CoPilot to copy the images, while a long press cancels the import.
As the drive copies, its screen alternates between copy status and remaining battery; I wish the two datapoints were on the same screen. I also found it a bit confusing at first to see the DJI logo appear after telling the CoPilot to start the copy process. I’m used to seeing logos on boot and thought perhaps the drive was restarting.
Yes, these are minor issues, but addressing them would reduce the user-interface friction and make the drive easier to use.
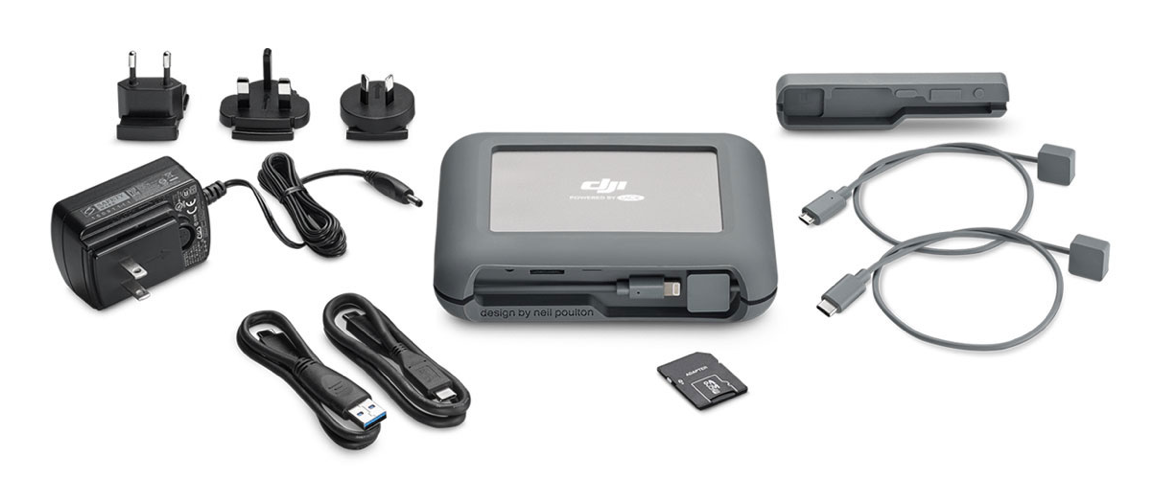
From an interface perspective, Lacie included everything you need in the box. The CoPilot is a USB-C drive, but Lacie included a USB-C to USB-A adapter. There are also Lightning and USB cables, a micro SD to SD adapter, and a wall charger with plugs for various countries. You don’t need to buy anything else to use the CoPilot. Lacie even includes a one-month subscription to Adobe’s Creative Cloud and three years of data recovery services.
SHOULD YOU BUY IT
After using the drive for some time, I’ve come to want it in my bag whenever I’m in the field and have taken it with me all the way up to the Arctic Circle. If you travel at all without a laptop or have a heavy shooting load, I would put the CoPilot high on your list. At $349, it is outside the realm of an impulse buy, but it’s well worth it.
The CoPilot fulfills its design promise. It’s well-implemented and supported, solves a major workflow issue for traveling photographers, and is very easy to use. Drone pilots and cinematographers will also find it useful, as it allows for media to backed up on-set or in the field.
If you don’t do much travel or on-set work, the CoPilot may be less appealing, but the time saved at import may be worth it.
Have a question? Ask it in the comments, and I’ll get back to you.
WHERE TO BUY
B&H – $349
FULL DISCLOSURE
While Lacie provided a drive for review purposes, the evaluation of the drive and statements made about it are mine and mine alone.
Apr
23
2018
The Mindshift Exposure is a sub-$200 “storm-resistant” shoulder sling bag for DSLR and Mirrorless Systems aimed at the active photographer.
Boasting of DWR water-repellent fabric, a tarpaulin bottom, sailcloth panels, and storm flaps, the Exposure is not your average, everyday bag. It’s meant to be outside weathering the elements, doing hero-bag work. At the same time, it can also hold a 13″ or 15″ laptop (depending on whether you go with the Exposure 13 or 15), a tablet, and all the gear you expect from your typical messenger bag like pens, cables, keys, and so-on. It even has a luggage handle pass-through, allowing it to be connected to carry-on luggage.
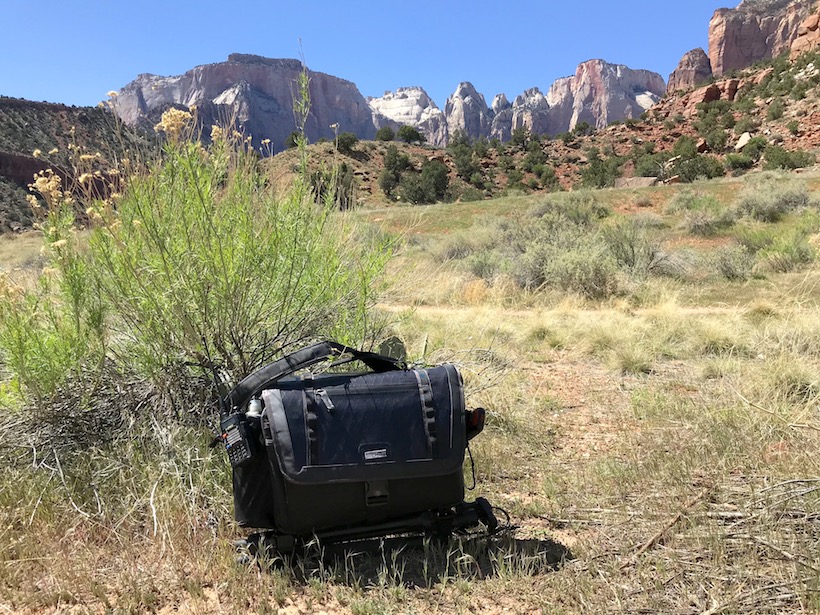
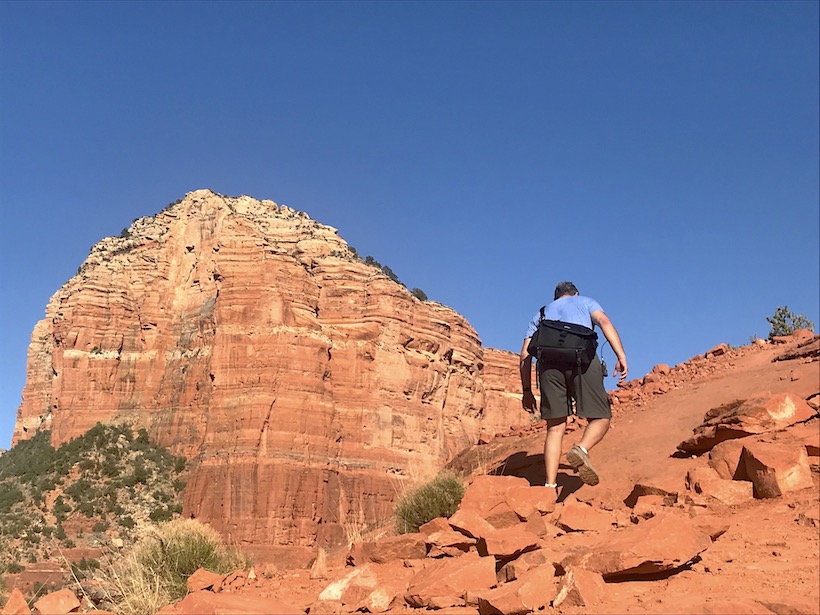
Mindshift Exposure 15 at Zion National Park
I wanted to know how good of a bag the Mindshift Exposure is, so I tested it for over a week in Zion National Park, Antelope Canyon, Horseshoe Bend, and Sedona, AZ. I used as my primary bag, tasked it with carrying all my gear for days on end, and gave it every job I normally assign to a backpack, including one I find of particular value: not killing me as I scrambled up steep climbs and narrow trails. Before we get to all that, though, let’s start with a little bit about the bag’s design.
Features and Design
The Exposure comes in two flavors: Exposure 13 and Exposure 15. As I mentioned earlier, the 13 can hold a 13″ laptop while the 15 is designed for a 15″.
In terms of capacity, the Exposure 13 is designed for:
- One ungripped body with a 24–70mm f/2.8 attached
- 2–3 extra lenses
- 10” tablet and a 13” laptop
- Accommodates 70–200mm detached
The Exposure 15 is designed for:
- One ungripped body with a 70–200mm f/2.8 attached
- 2–5 extra lenses
- flash
- 10” tablet and a 15” laptop
The walls comprising the camera and laptop compartments are thick and well-padded. Every zipper and loop feels designed to take a beating. I appreciated the external flaps protecting the camera compartment from rain. Like the rest of the bag, they have a strength to them and are not a mere marketing gimmick. The Exposure does come with a rain cover for when you need to hunker down.
Also included with the bag are tripod straps, allowing you to attach a travel tripod to the bottom, and a removable cross-body stabilization strap that keeps the bag close to you as you move about outdoors.
I liked the shoulder adjustment strap. It is a dream to work with. There’s no fiddling with stretching out a loop inside a another loop against a piece of metal to adjust the length. All you have to do to adjust the shoulder strap is flip the adjustment buckle up, move the strap, then flip the buckle down to lock it in place. The metal hardware, by the way, is anodized and thus resistant to corrosion, a nice feature if your straps are constantly in mud or puddles.
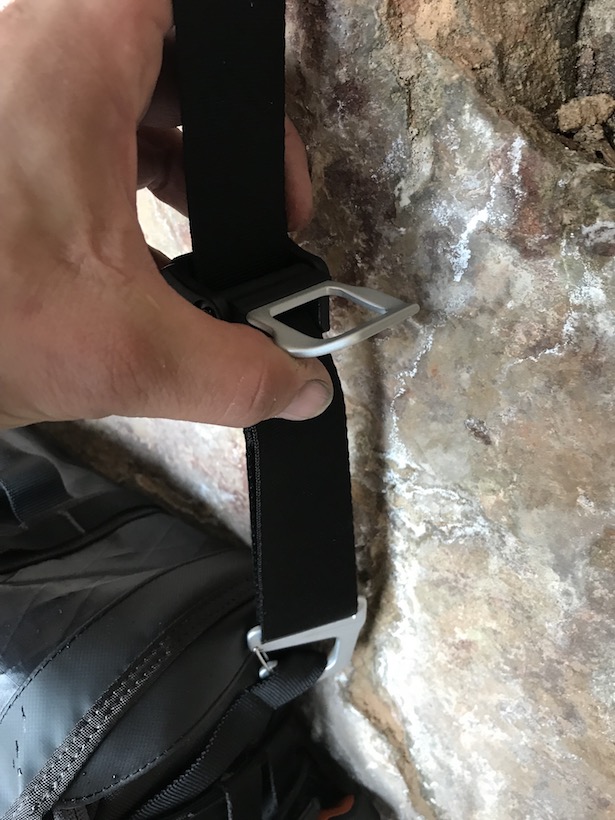
Close-up of the shoulder strap adjustment. The strap length is adjusted by flipping the buckle up, adjusting the length, then flipping the buckle back down
Another nice feature is that the bag is compatible with the Peak Design Capture Clip and the SpiderLight Camera Holster. This will allow you quick access to your camera while on the move, and I like that Mindshift included this in the design.
Beyond the notable features are some standard ones, like a mesh water bottle holder that holds most 1 liter bottles and moveable camera compartment dividers to keep your your gear from banging around during transport.
In the Real World: Zion
The two shots below show my load-out at Zion. I carried along my trusty Sony A7II, Zeiss 16-35 f/4, Zeiss 24-70 f/4, small first-aid kit, Vello wireless intervalometer, water bottle, walkie-talkie, Garmin etrex GPS, and my Induro travel tripod.

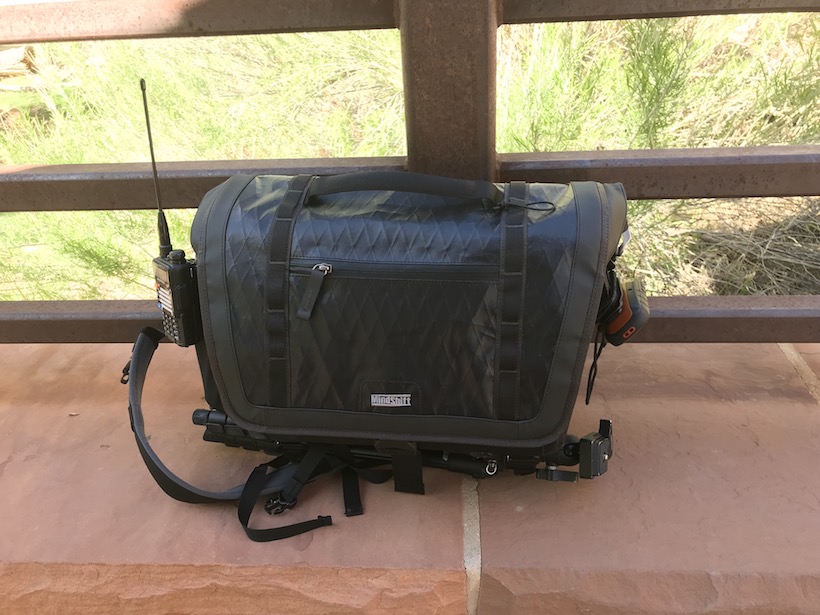
Tripod attached to the bottom of the bag. The straps have a quick-release, allowing the tripod to be easily accessed.
The bag handled the day pretty well on flat trails, steep trails, and in areas where it would be subjected to water. The one thing I was worried about was how well my shoulders would hold up with a single shoulder strap as compared to the weight balancing I’d get from a backpack. The cross-body stabilizer strap did a very good, if not exceptional, job of weight distribution and kept the strap from digging into my shoulder. On flat and medium slopes, the bag was excellent. It was well-balanced, and the stabilizer strap kept the bag close to me. I never felt like I had to reign the bag in as I turned my body.
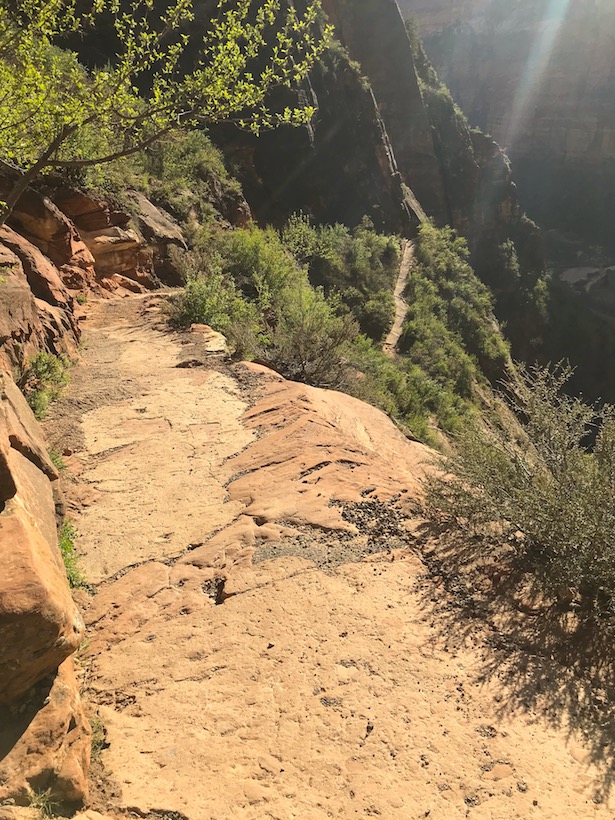
A look down the steep slope of Zion’s Hidden Canyon trail. Check out the portion of the trail on the top right of the image just around the corner from where I was standing.
The first “real” test was Zion’s Hidden Canyon trail, which goes up 850 feet in about one mile. I made the stabilizer strap work, and I have to say it exceeded my expectations. It was more than capable while heavily loaded in a difficult environment. I really didn’t expect much here, but I was surprised.
The next test was water resistance. I didn’t go mad here and jump into The Narrows with it, but I did take it to Zion’s Weeping Rock and let it get a bit of time under water. Water is definitely not a big deal. The fabric easily handled running water with no issues.
In the Real World: Antelope and Horseshoe Bend
Days 2 and 3 with the Exposure were spent running around Page, Arizona shooting at Upper Antelope and Horseshoe Bend.
The load-out:
- Sony A7II, Zeiss 16-35 f/4
- Sony A6000 with Zeiss 24-70 f/4
- Batteries, first aid kit, water, Rocket Blower, Blackrapid strap, an intervalometer, and Sony IR remote
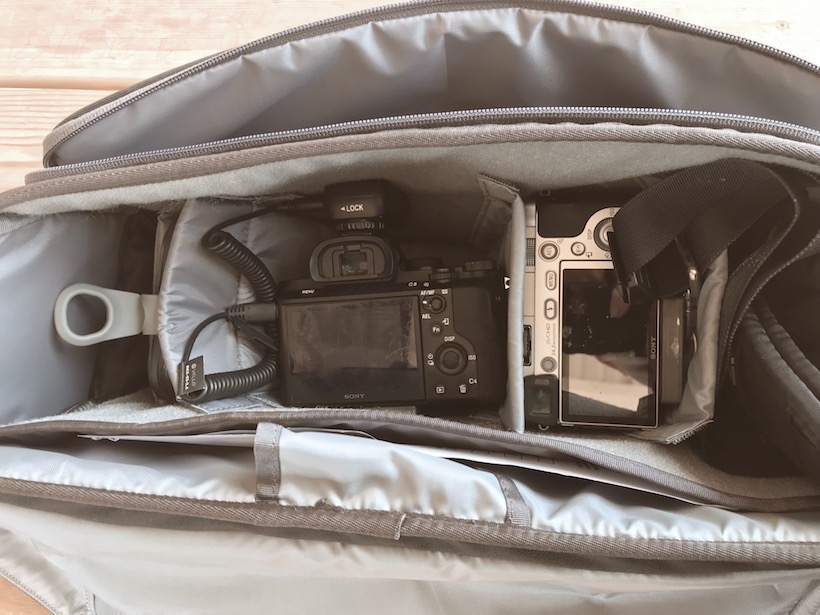
Sony A7II with Zeiss 16-35 f/4 and A6000 with Zeiss 24-70 f/4
Man, was I glad to have both a wireless and an IR trigger that day! There’s nothing like showing up at Upper Antelope and finding out the cable on your trigger is no longer working. Have a backup!
Ok, back to the bag. I used the Exposure to tote all my gear while in the 4×4 at Antelope and go on the short walk/hike to the Horseshoe Bend observation point. The bag was a pleasure to use. This was its sweet spot: outdoor/adventure work in short- to medium-duration outings. It was fantastic, because it’s a lot smaller than a backpack and has a significantly lower profile. It’s sleek and stays close to your body. You can run with it if need be. It’ll bounce a little, but I found that to be minimal, especially compared to a typical shoulder bag.
I have to say this was an easier outing compared to Zion and significantly easier than what was to come at Sedona.
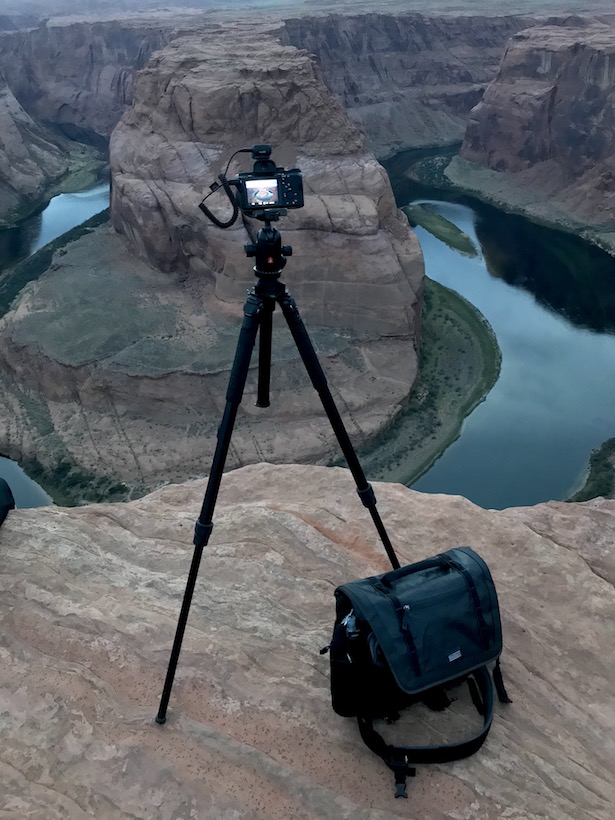
Shooting Horseshoe Bend
In the Real World: Climbing Sedona’s Bell Rock
Your everyday messenger bag would be a hazard at Bell Rock, as it would be constantly shifting from side to side. Bell Rock is not Zion’s Angel’s Landing, but it does have some steep drop-offs and can be deadly if you’re not careful. It is definitely where you would typically use a backpack, but the Exposure 15 is what I took with me for the scramble up.
I used my typical load out here: Sony A7II, Zeiss 16-35 f/4, and Zeiss 24-70 f/4. The bag handled the terrain very well. It never shifted or affected my center of balance. It did what it needed to do: stayed out of my way as I climbed and gave me quick access to my gear when I stopped to shoot.
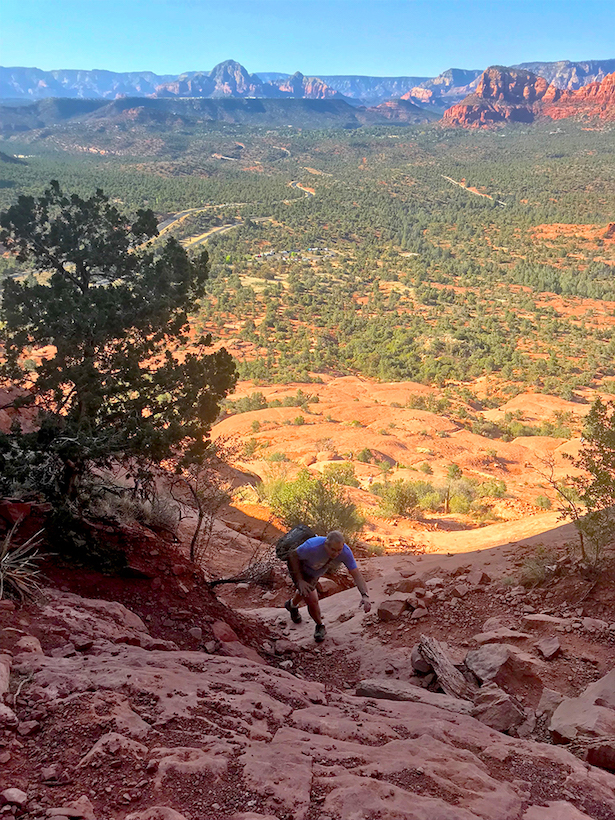
Climbing up Bell Rock is a lot of fun, but you do need to keep your eyes on where your feet are going.
You can’t beat the views on the way up.
Field Notes
The following are a few notes I collected as I used the bag. They’re good things to keep in mind if you’re considering the Exposure:
- The cross-body stabilizer can be moved, allowing the bag to be used on the left or right.
- The camera holster pad (for the Peak Design capture clip or Spiderlight holster) is on the left side of the bag and will allow access to the camera when the camera is on your right shoulder. It is difficult to get to the camera when using the cross-body stabilizer if you carry the bag on your left shoulder.
- The water bottle can be difficult to get to when using the cross-body stabilizer when the bag is on your right shoulder, as the bag is designed to not move much when the stabilizer is in use.
- I’d love to see a business card slot I can slip my card into in case the bag is ever lost.
Overall thoughts
Mindshift has made a great bag. The Exposure is small, light, and remarkably stable, even when used on hikes or climbs. Its sweet spot is short- to medium-range hikes. Keep in mind you’ll have a limited amount of water with you when using the Exposure. It’s not designed to be an all-day hiking bag but rather a versatile shoulder bag for outdoor work. If that’s what you’re looking for, get the Exposure. It will serve you well.
Where to buy:
p.s. Here’s quick shot of Antelope. I’ll be getting more images up on Instagram in next few days.
Jul
06
2017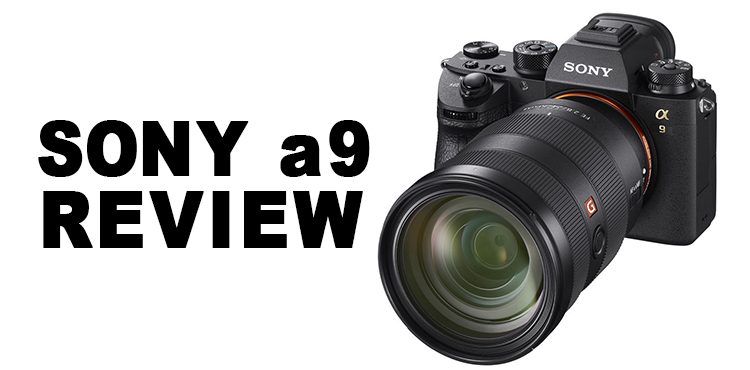
Every once in a while a camera comes along that draws a line in the sand, redefines a segment, and marks a milestone in photography. The first from-the-ground-up dSLR, the Nikon D1, was such a camera. Canon’s consumer-level digital Rebel was such a camera as was Canon’s 5DMKII with its breakthrough video performance. Cameras like this don’t come along everyday, but when they do they mark a fundamental shift and a category maturity for a manufacturer.
Aimed at Sports and wedding photographers, the A9 is positioned to be a camera long-remembered by photographers as a defining moment for Sony and mirrorless cameras. The list of specs is impressive:
- 24 megapixel stacked full frame sensor
- 693 phase detection autofocus points with 93% coverage
- A shooting buffer capable of handling 241 compressed raw files or 362 JPEGs
- 5-axis in body image stabilization
- OLED viewfinder with 120fps refresh
- 4K 24p full frame video
And that’s not all, the A9 has a silent electronic shutter, a highly performant autofocus system capable of 60 autofocus calculations per second, and every Sony fanboy’s favorite spec: 20 frames per second with no viewfinder blackout- making it faster than Canon’s 1Dx and Nikon’s D5.
Yet specs, however impressive they are, don’t make a camera. I’ve had the chance to spend a good amount of time with the A9 and what follows are my impressions of using it day-in and day-out.
Dials and Controls
New Dial & Dial Lock
The first thing you’ll notice about the A9 is the addition of a two stacked dials on the left dedicated to burst mode and focus. This is a nice addition as it saves having to go through the fn options to set the burst and autofocus settings. Both dials have a button lock you have to depress in order to change their settings. The design works well, but I wish there was a more elegant way of locking the dials as I found the press-to-turn process a bit cumbersome. It’s not that the implementation doesn’t work, it’s that it’s difficult to unlock and change settings without taking your eye off the viewfinder. This is especially true of the AF selector which has a tiny push-button unlock mechanism.

Top view of the Sony A9 showing the newly added left dials for Autofocus and Burst mode.
AF ON and AEL Buttons
If there is one button I was happy to see it would be: AF ON. Sure you can customize buttons on the A7 cameras to use rear AF, but you shouldn’t have to do that as it takes away from the camera’s customizability.
I personally have no use for the AEL button as I photograph everything on manual, but it is a good addition nonetheless and signals a new focus (no pun intended) on ergonomics from Sony.
While I liked the AF and AEL buttons, I did think they could have been more pronounced. I felt they were a bit too small, and inset, and not as easy to depress or tactilely locate while looking through the viewfinder as they could be. I also felt the AF ON button was a bit too close in proximity and tactile feel to the video recording button (I recorded a couple of nice videos when I thought I was focusing. I also sadly managed to end a video I was recording when I thought I was focusing) I hope Sony moves the recording button in future iterations and makes the AF button tactilely distinct.
Focus Joystick
The A9 has a joystick dedicated to setting the focus point. This is a fantastic addition! The joystick is exactly where it needs to be and its feel is perfect. The combination of AF ON and the focus joystick make for a much more streamlined shooting experience as you don’t have to move your fingers to all corners of the camera to set and achieve focus. It’s awesome not to have to hit the center dial button to move the autofocus point about as you do with the A7 line.
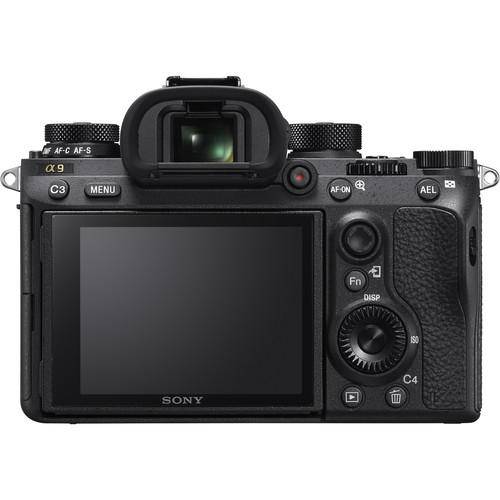
Back view of the Sony A9 showing the newly added AF-ON and AEL buttons and the focus point joystick
Usability
The Silent Shutter
The first configuration change I made with the A9 was disabling the AF beep as I hate hate hate having to hear a sound everytime the camera achieves focus. Easy enough: go into the camera settings and turn off notifications. With the “beep” disabled, I went to shoot, focused, depressed the shutter and….nothing. The viewfinder didn’t blackout and I didn’t hear the shutter fire. I had to stop and check to see if the camera actually took a photo. That moment was a revelation! You mean I never ever have to stop looking at my subject and, if I want it, I never have to hear a shutter? That’s just plain awesome. By the way, there’s a visual cue in the viewfinder indicating a frame was captured. It’s easy to miss the first time you use the camera, but you quickly know to look for it. Incidentally, you can enable a shutter audio sound if you want.
Menus
Sony’s menus have historically been a sore point for anyone switching from Canon or Nikon. Sony cameras offer a lot of configurability, but their menus to date been anything but intuitive. The A9’s menu remedies this by including a custom “My Menu” allowing you to add settings or functions you typically utilize. This means you no longer have to hunt for the “format” menu item to clear your cards.
The Battery and Grip
I own no fewer than 5 batteries for my A7II and I always make sure they are charged before serious outings. The batteries are small and I have to be cognizant of how much charge I have left. For example, I always make sure I have a fresh battery to go just before sunset or sunrise shoots as the last thing I want is to miss a shot because I have to fiddle with the battery.
Fortunately, the A9’s battery is a significant step up in size and capacity from the A7 series’ W battery. Also, Sony significantly reduced the A9’s power consumption compared to the A7RII.
The A7RII, for example, has a CIPA rating of 290 shots while the A9 clocks in at 480. This is still significantly shorter than a 5DMKIV‘s impressive 900 images per battery through the viewfinder- though it should be noted that the 5DMKIV’s battery clocks in at 300 images using LiveView while the A9 can yield 650 images per CIPA standards.
One result of the larger battery is a wider grip. I like the slightly larger form factor, but I’m sure there are those who disagree. This is largely a matter of preference. Either way, the A9 remains significantly smaller than its Canon or Nikon counterparts.
Viewfinder, Autofocus & Burst Mode
I don’t care if you shoot sloths or plain ‘ol concrete drying exclusively for your day job, nothing puts a smile on a photographer’s face like burst mode- and 20 frames per second sure does the trick! It’s a blast hitting that shutter button, daring the A9’s buffer, and letting the camera fly.
The A9’s autofocus performance is impressive and the camera is, as Sony promises, stable throughout- what this means is I didn’t get it to lock up on me. Also, having no blackout in the viewfinder is fantastic as I mentioned previously. It’s a nice-to-have when shooting slower action, but it’s a godsend when you’re trying to nail a composition during fast-action sequences.
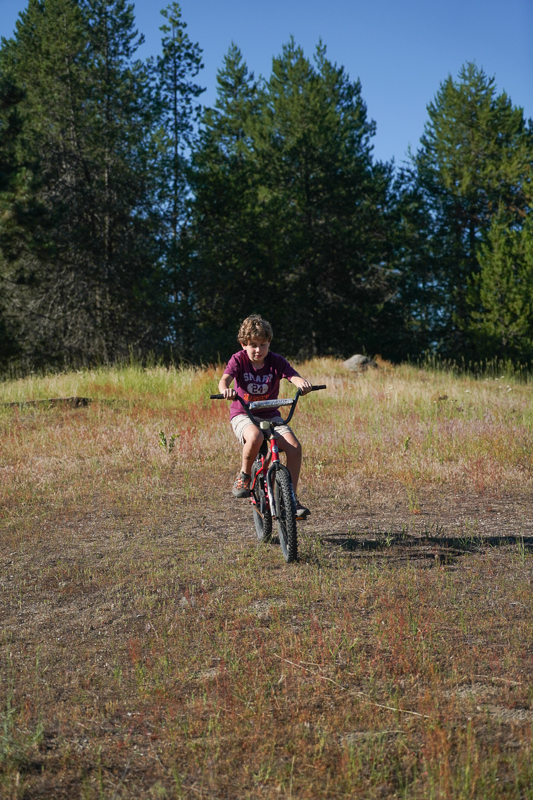
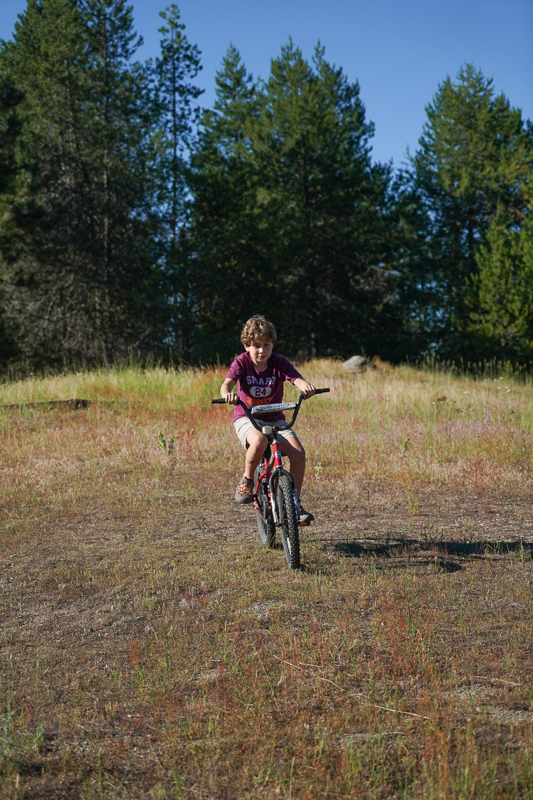
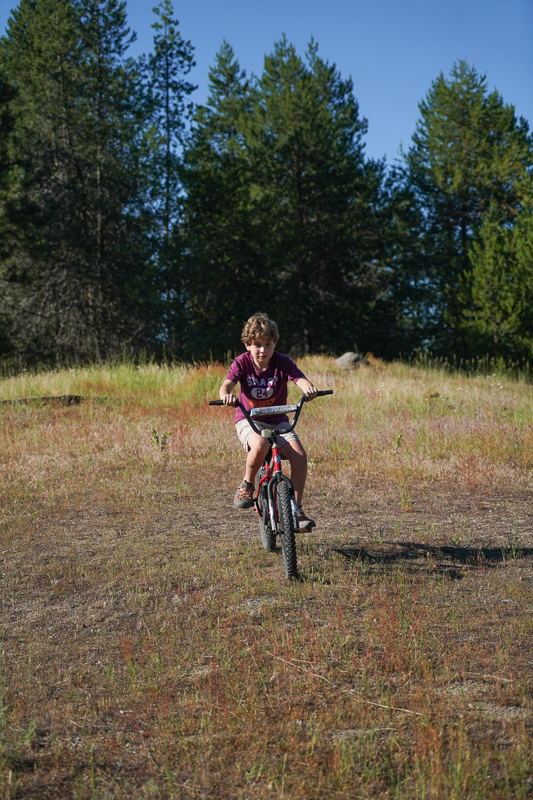
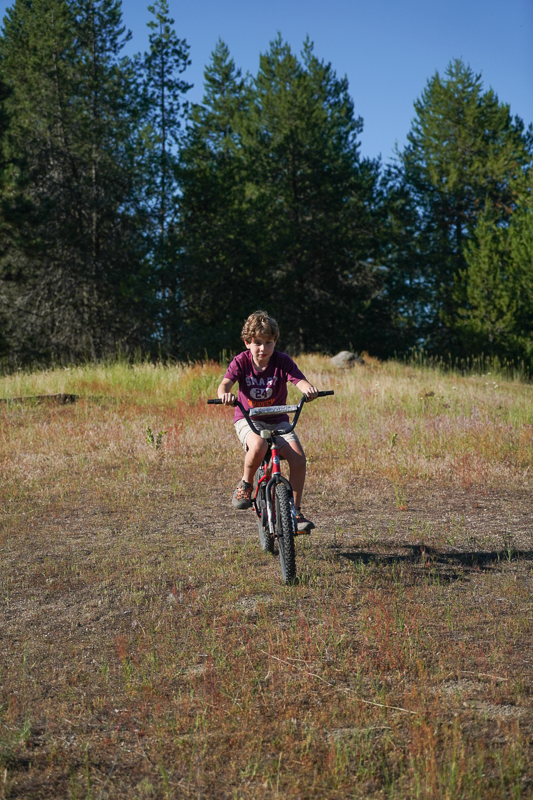
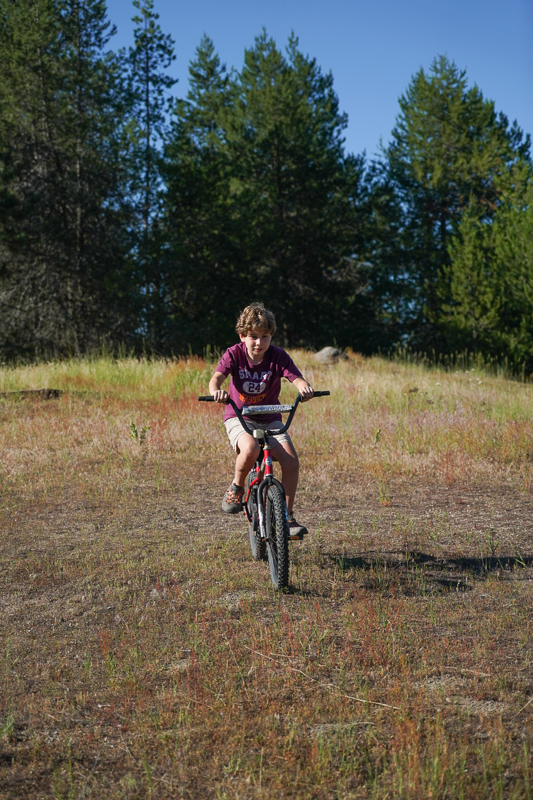
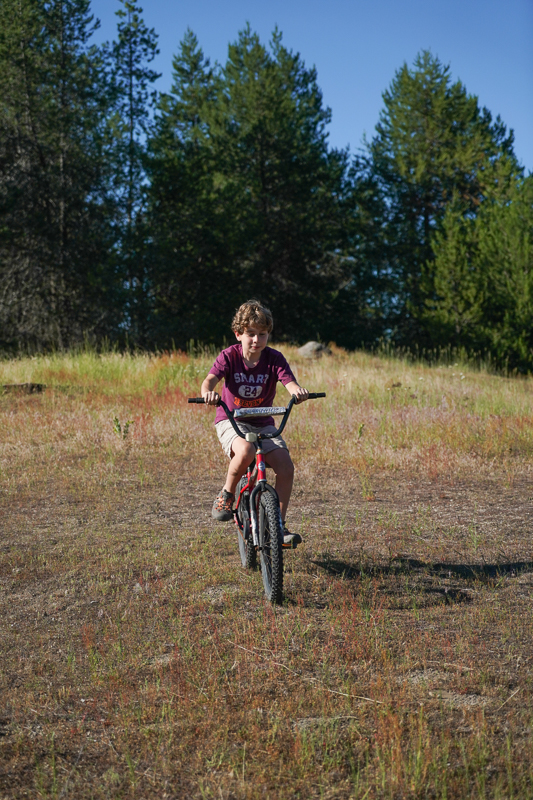
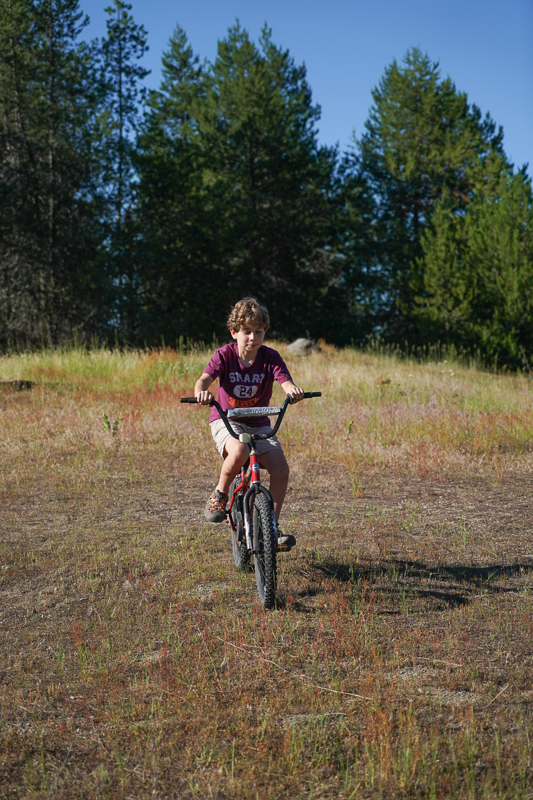
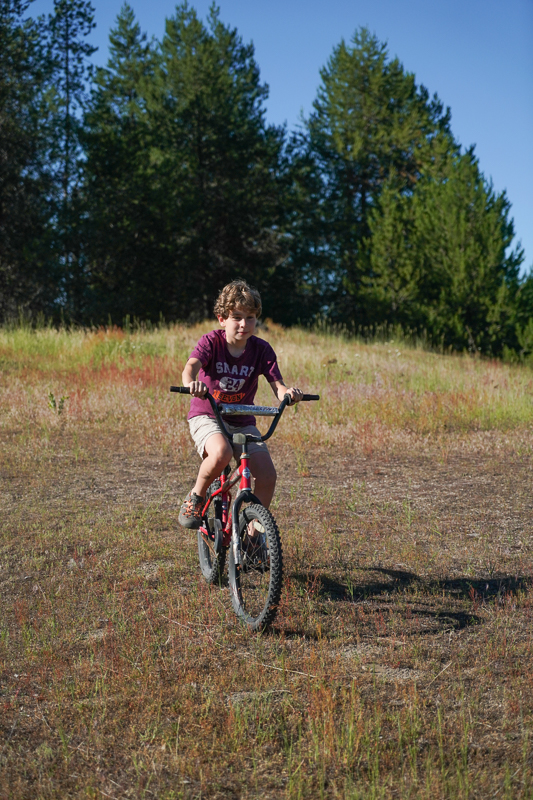
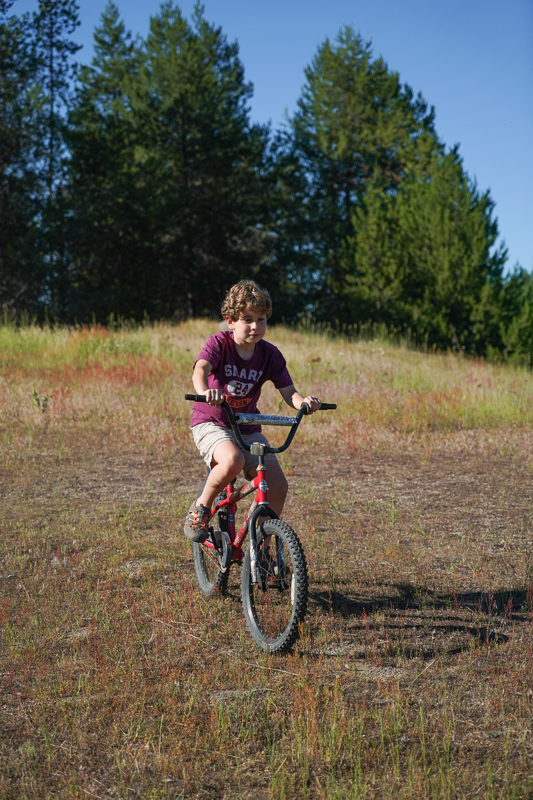
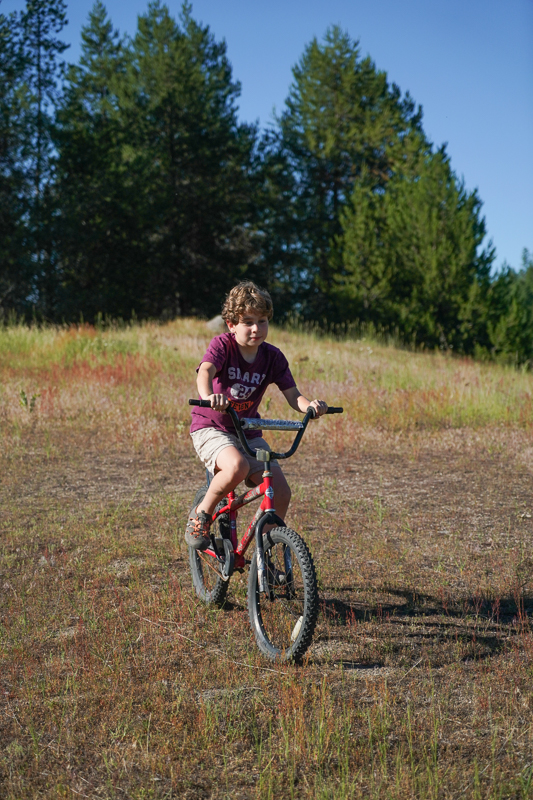
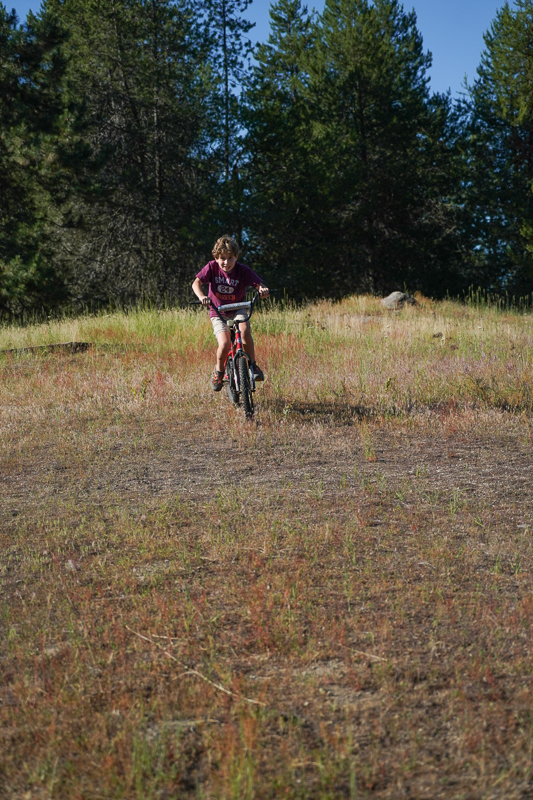
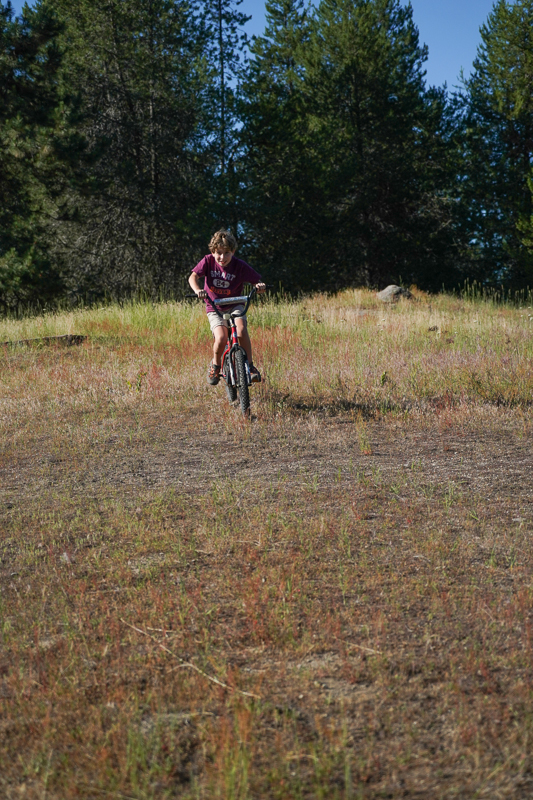
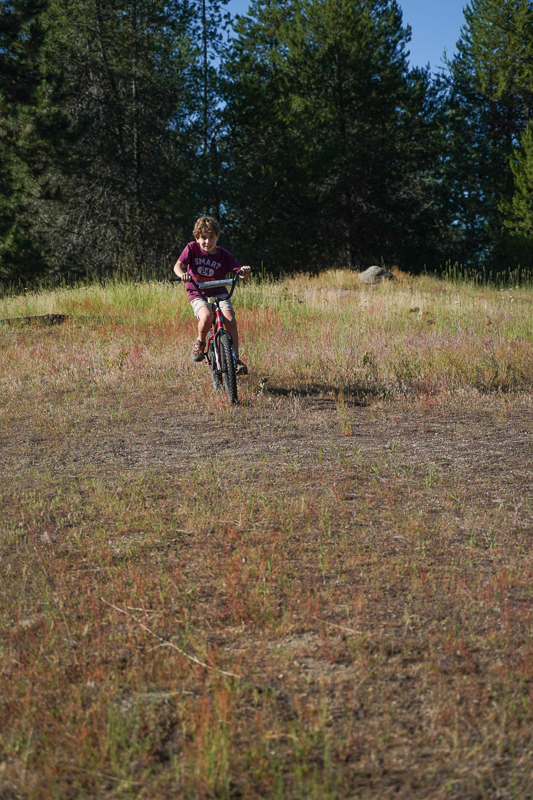
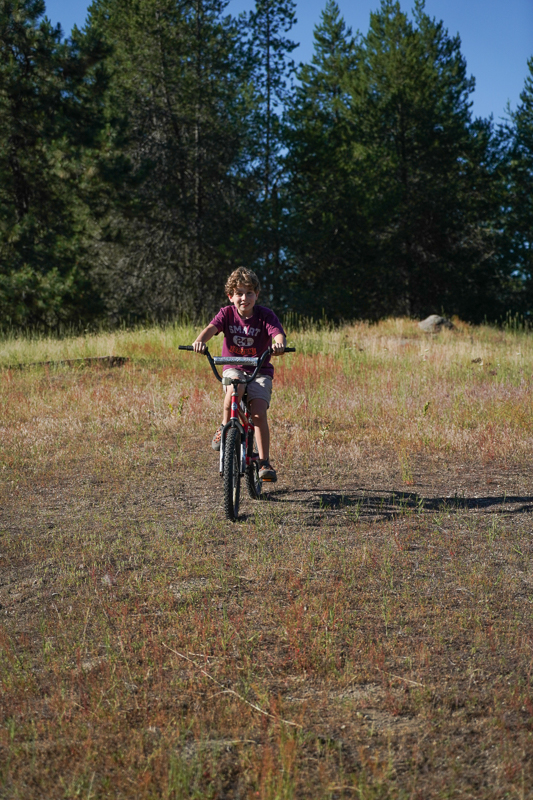
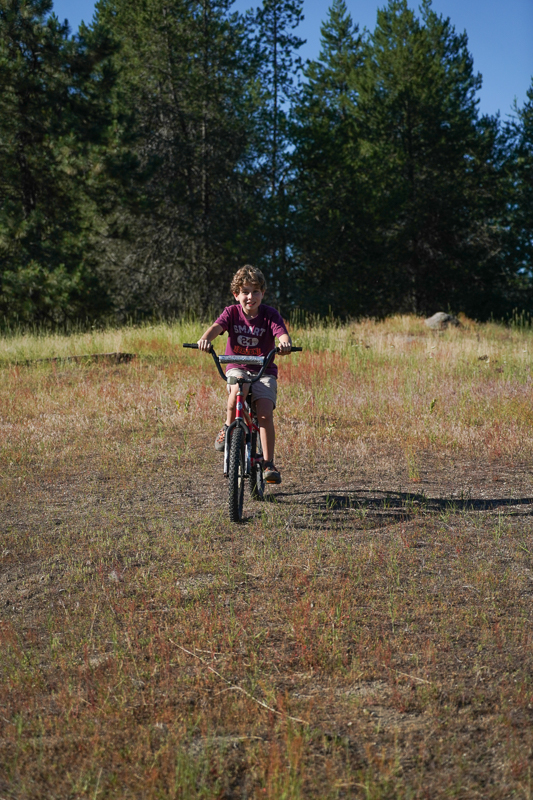
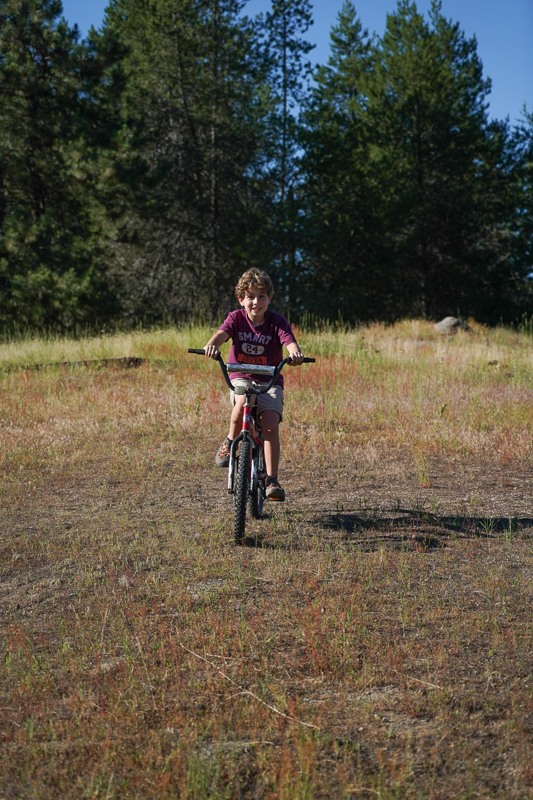
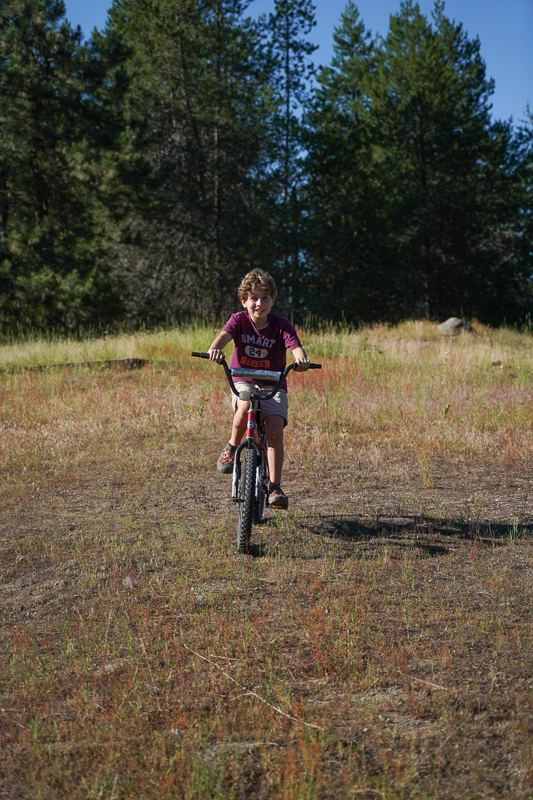
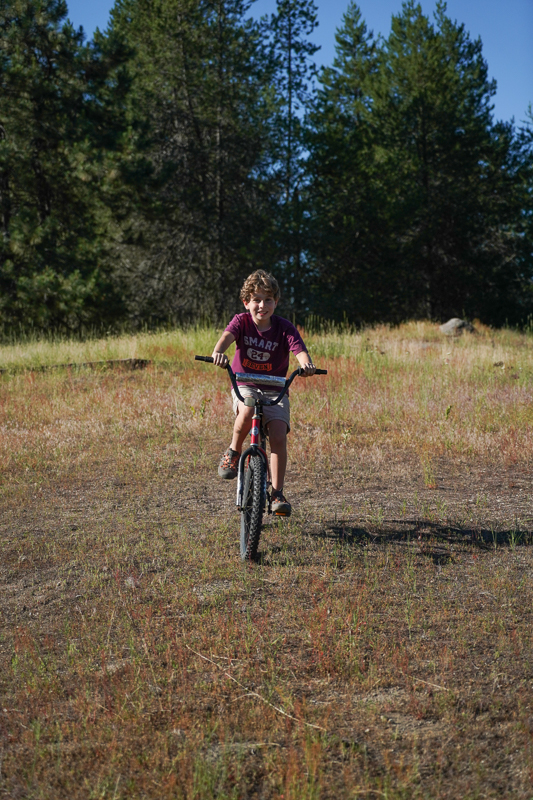
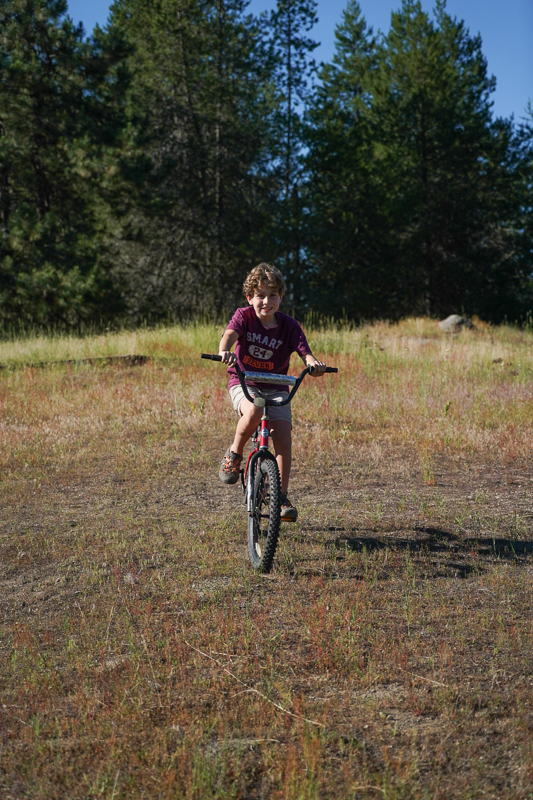
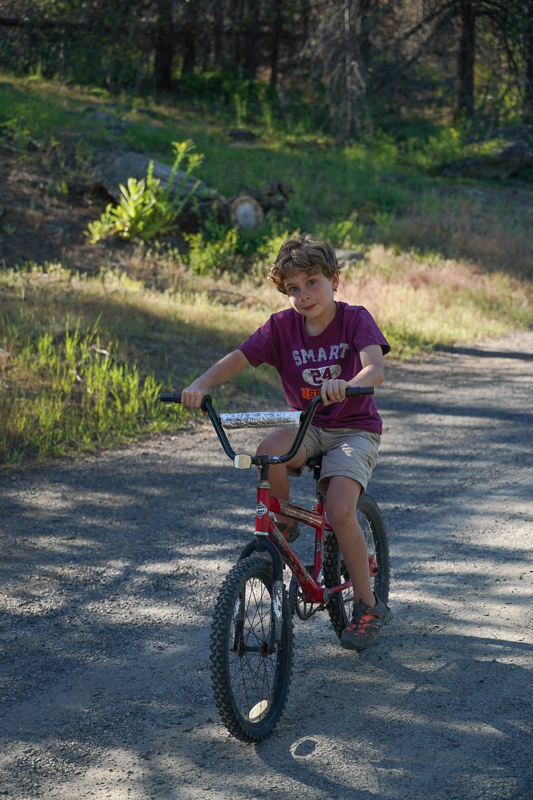
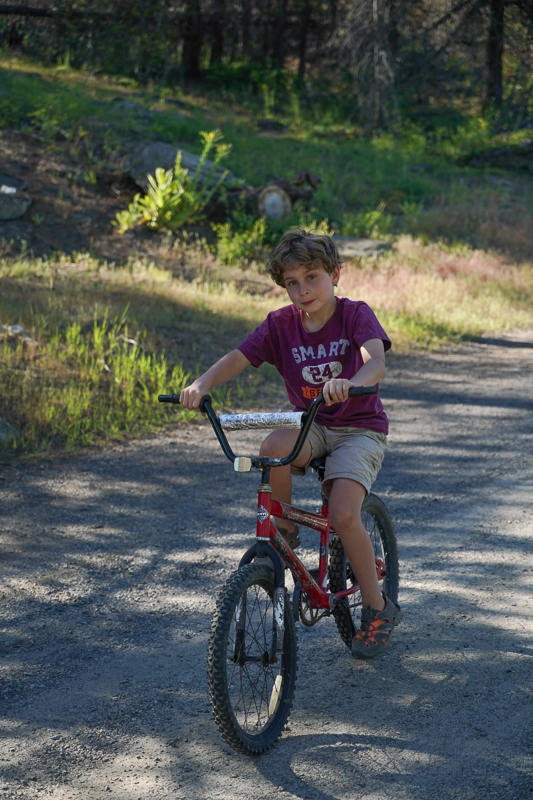
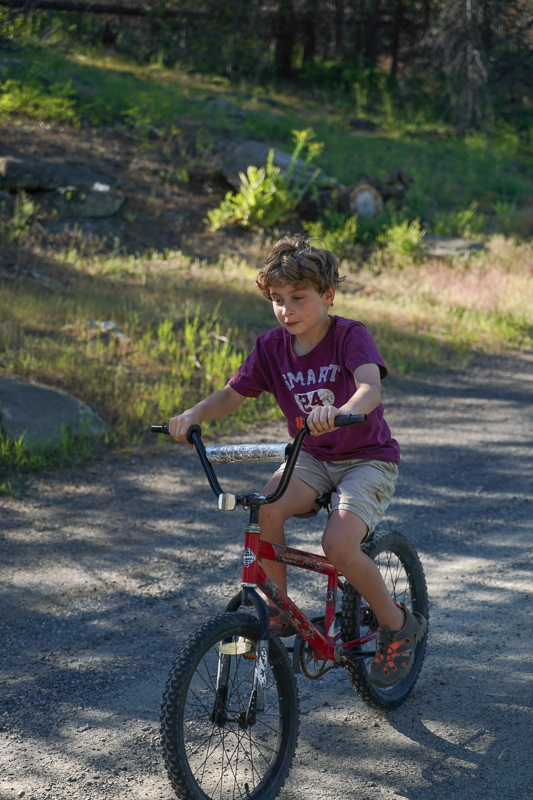
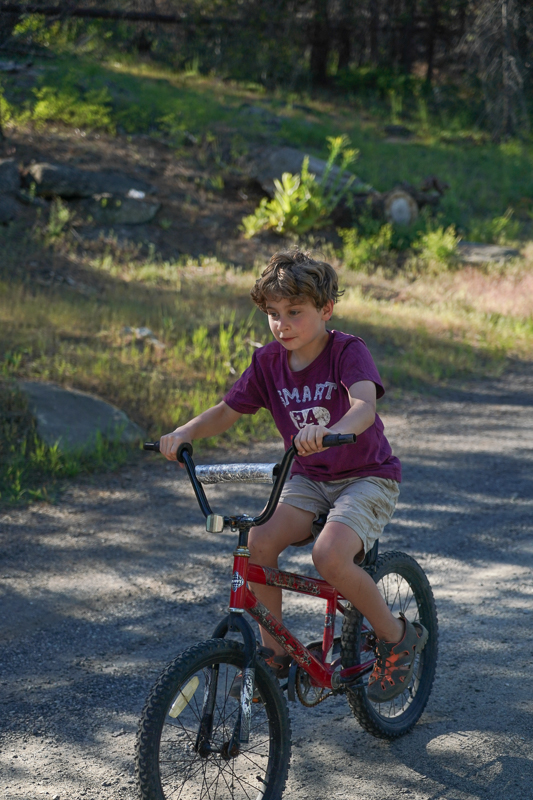
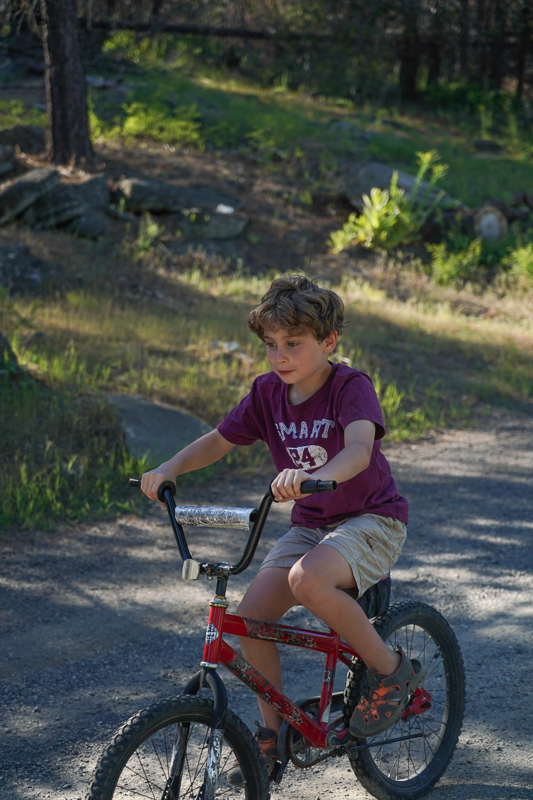
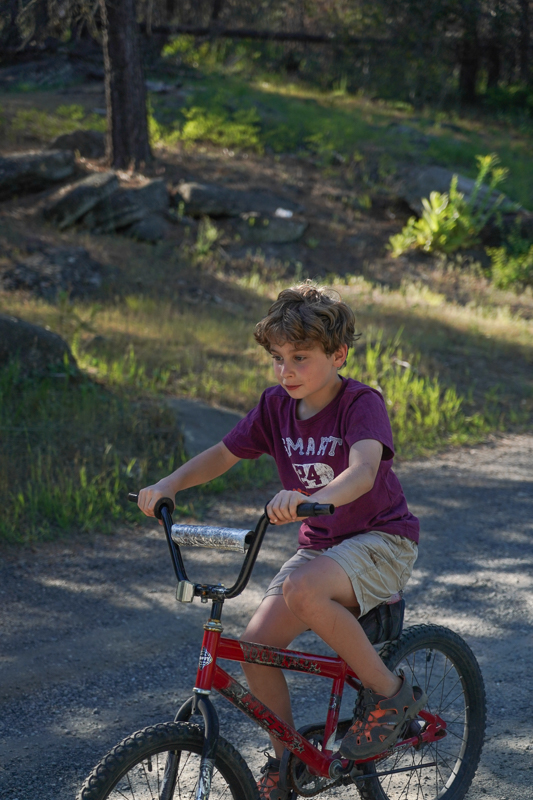
I put the AF through its paces in three tests using a challenging subject: a hyperactive 9yr old cycling down a hill towards the camera (aka Jonah, my son). I executed 3 separate tests using the A9 coupled to a Zeiss 24-70 f/4 lens. The camera was set to AF-C and Lock-on AF: Flexible spot Medium. Two of the tests were down the same hill while the 3rd was performed in an area with tree cover and spotty light in an attempt to challenge the AF system. 20 images from each sequence were placed in the galleries below. Incidentally, I set the lens aperture to f/4 to ensure the resultant focus wasn’t due to depth of field.
AF Test 1
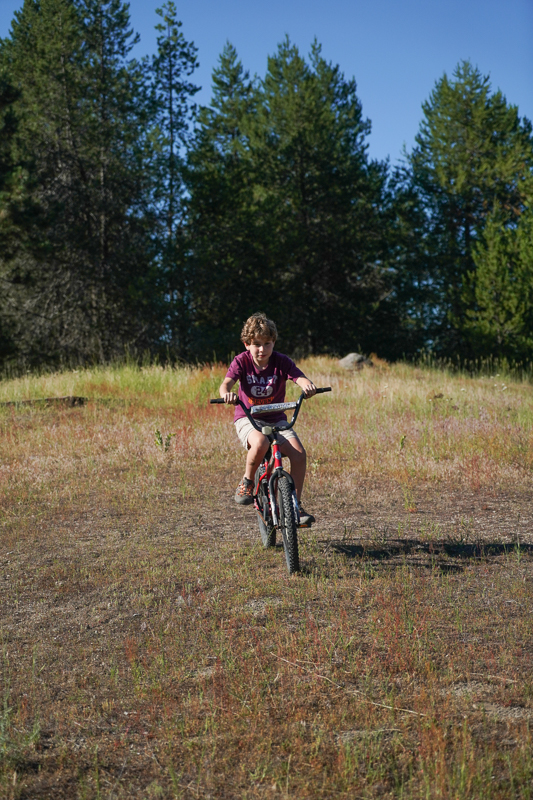

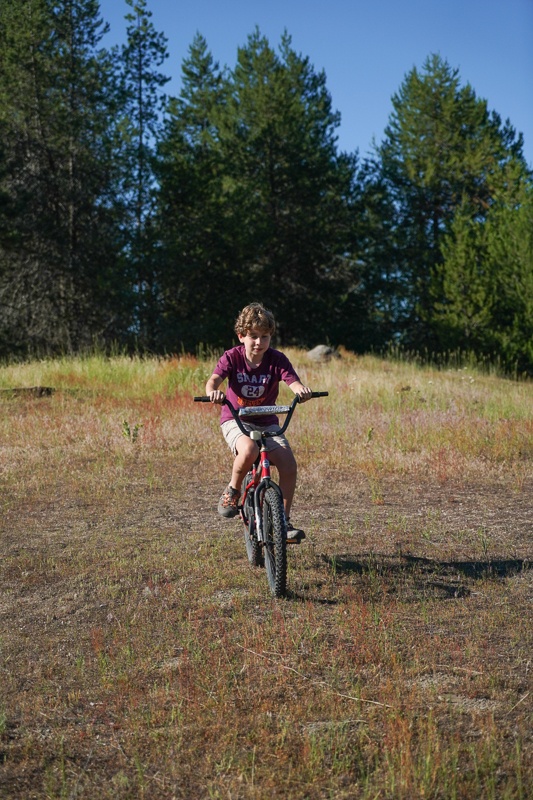
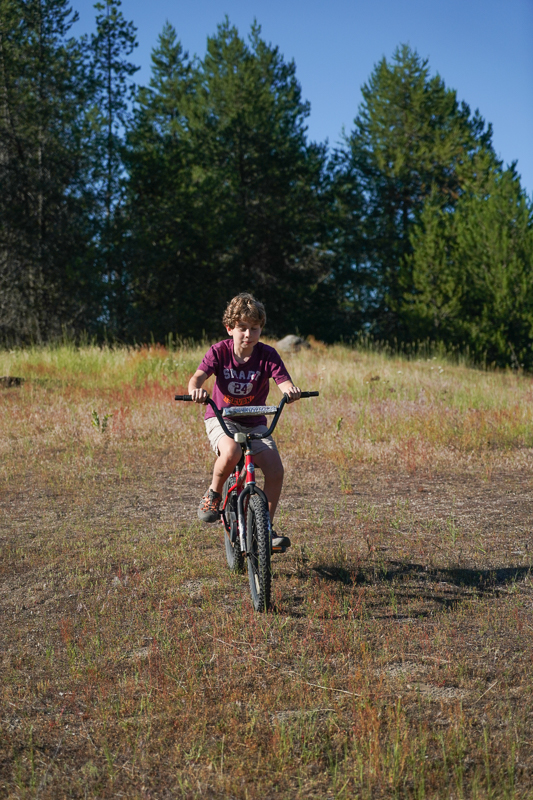
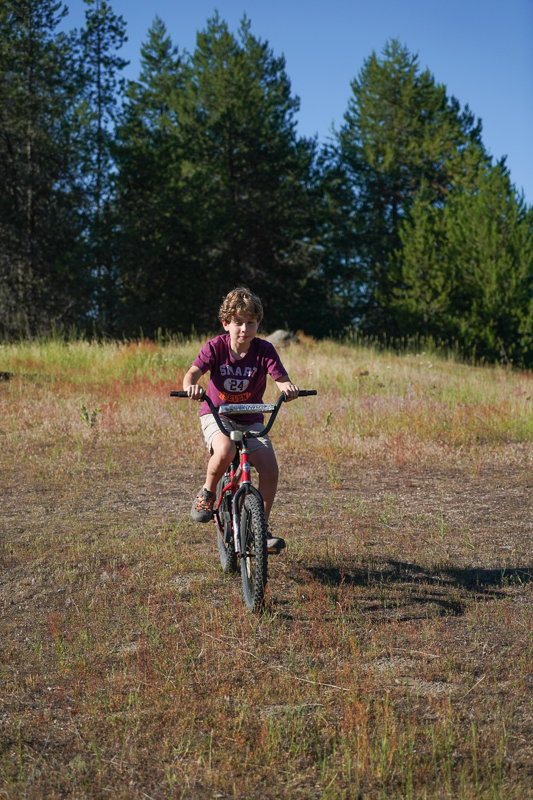
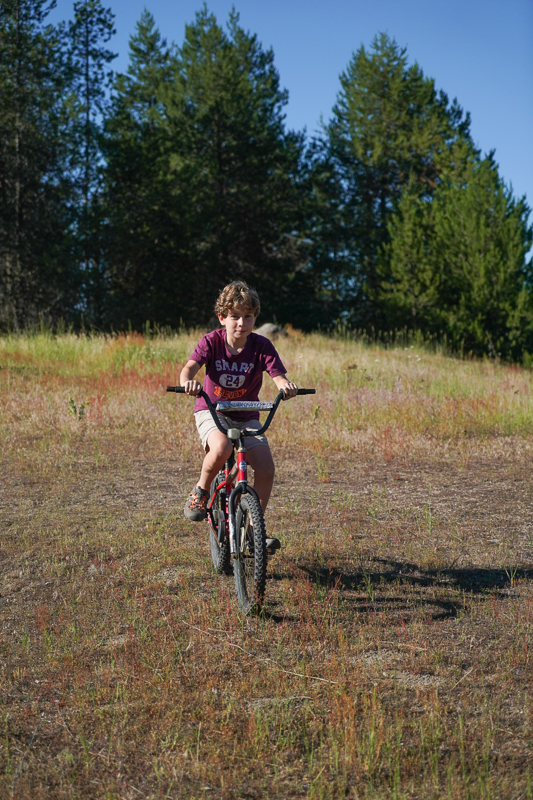
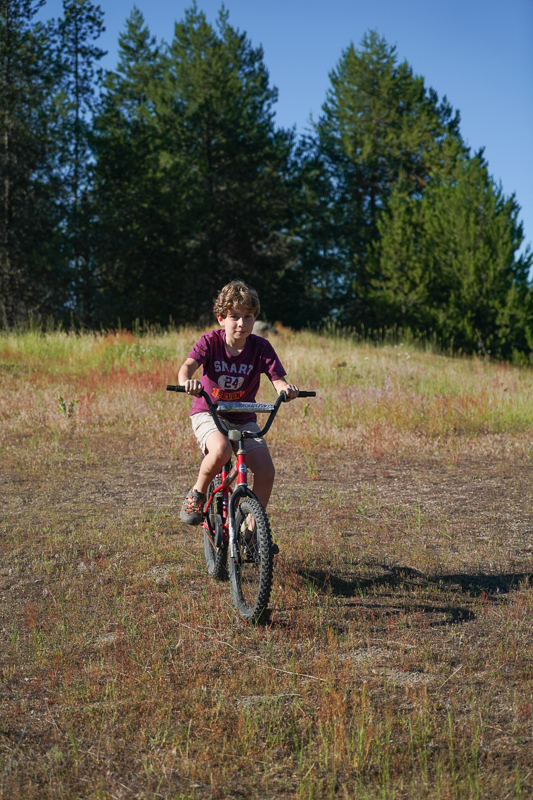
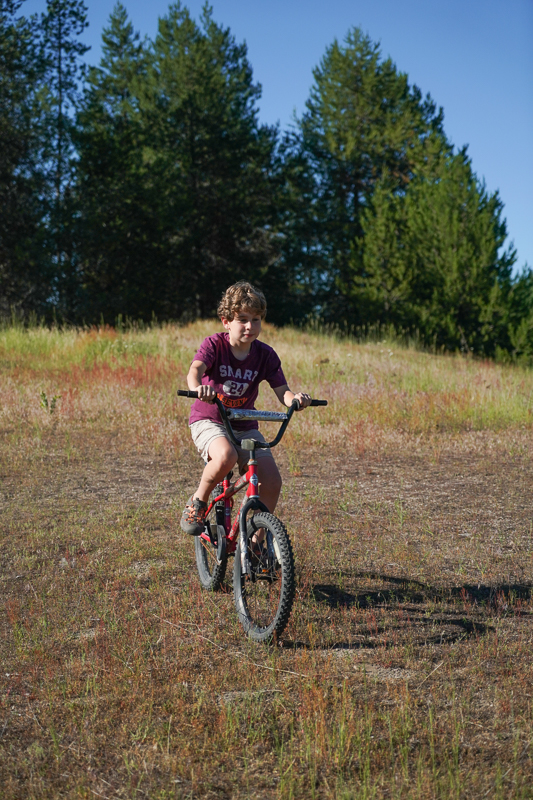
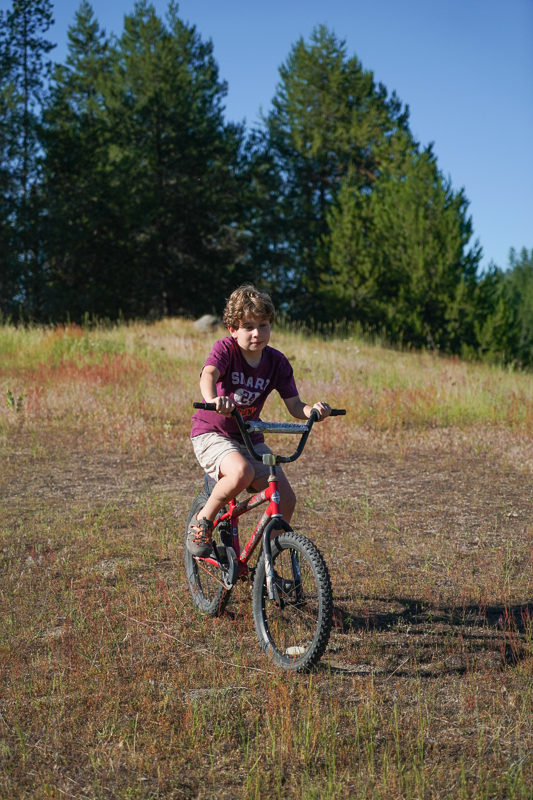
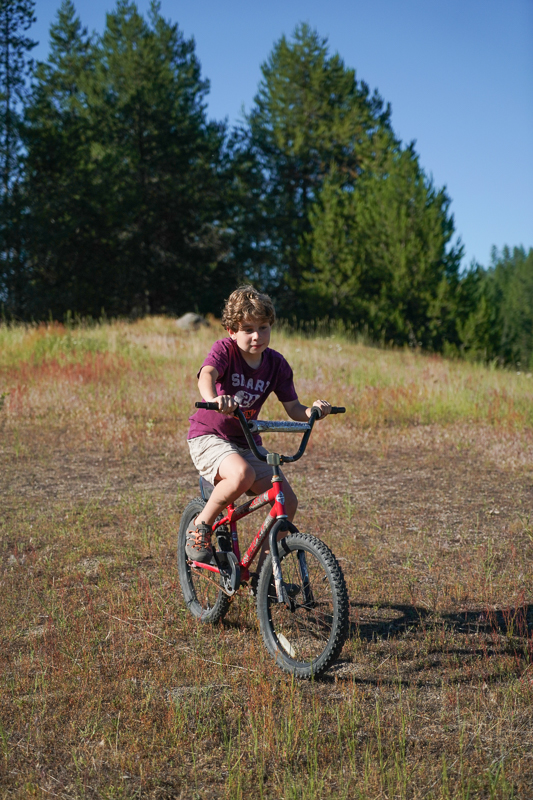
AF Test 2
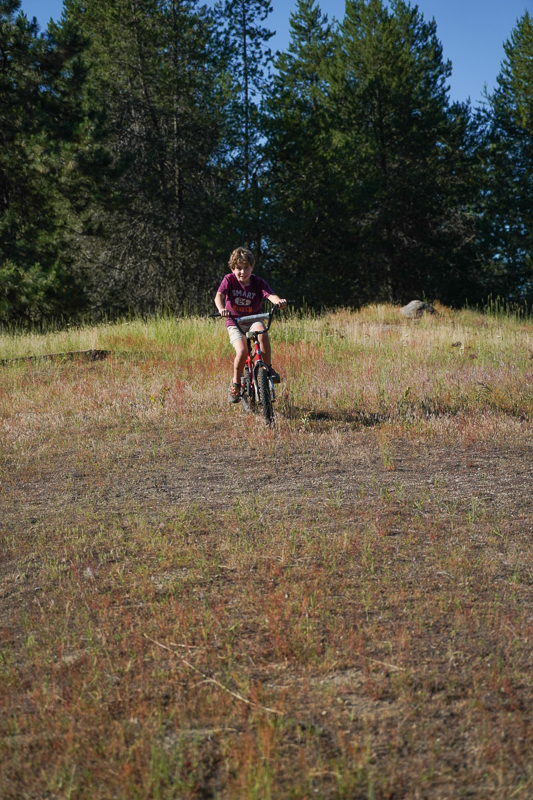
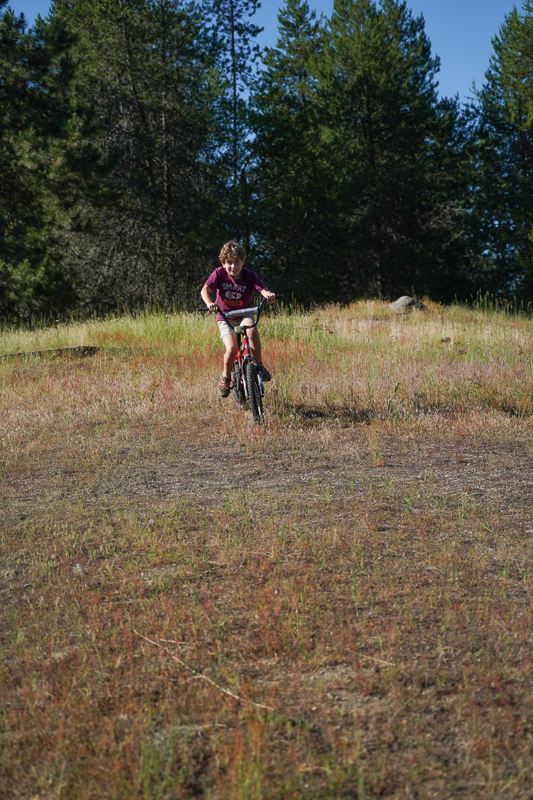
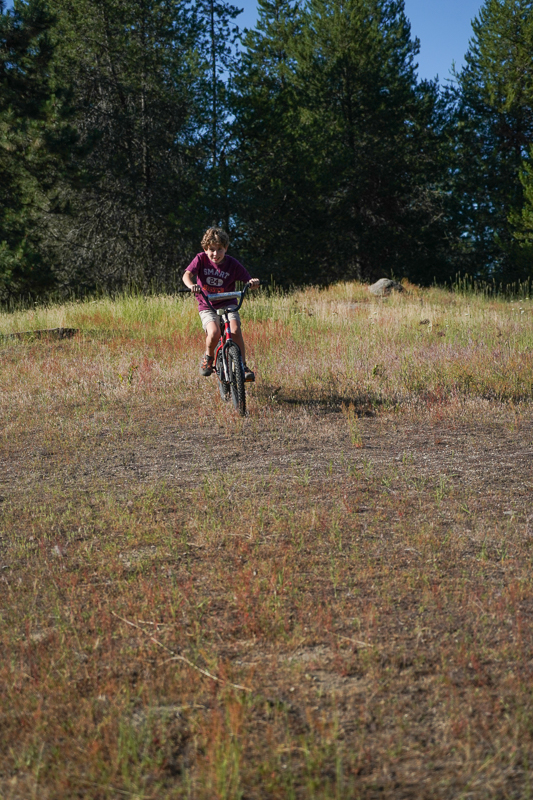
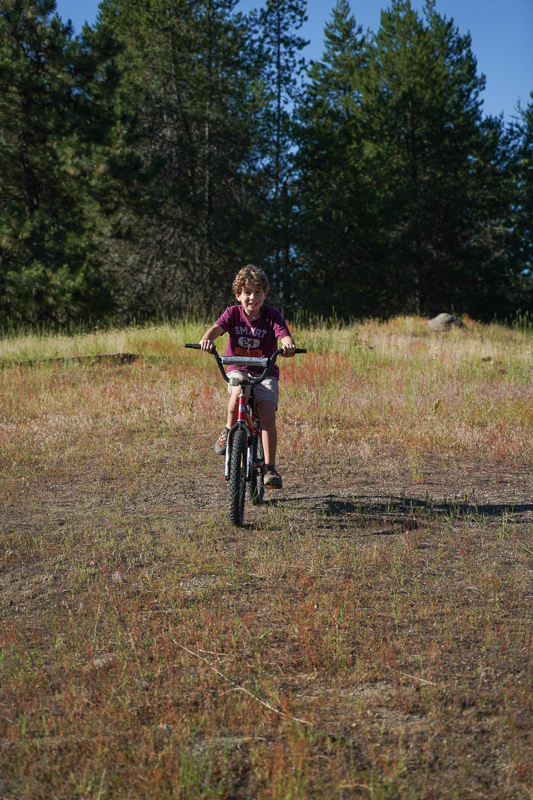

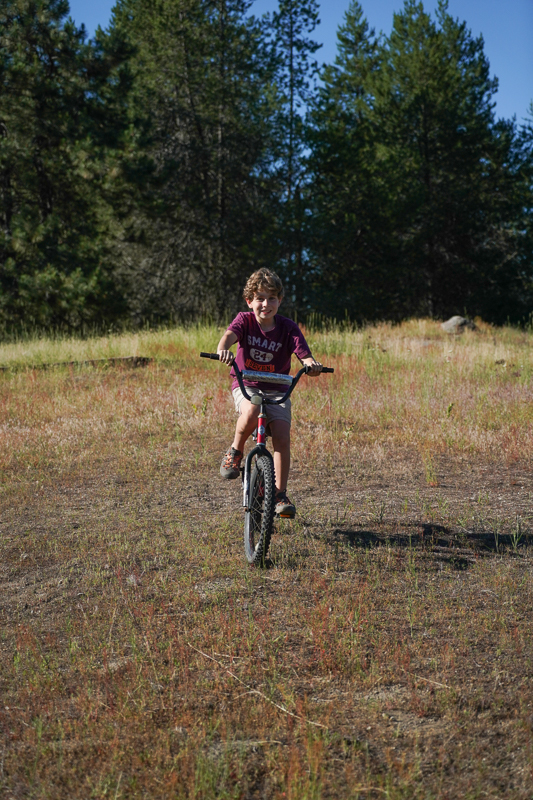
AF Test 3
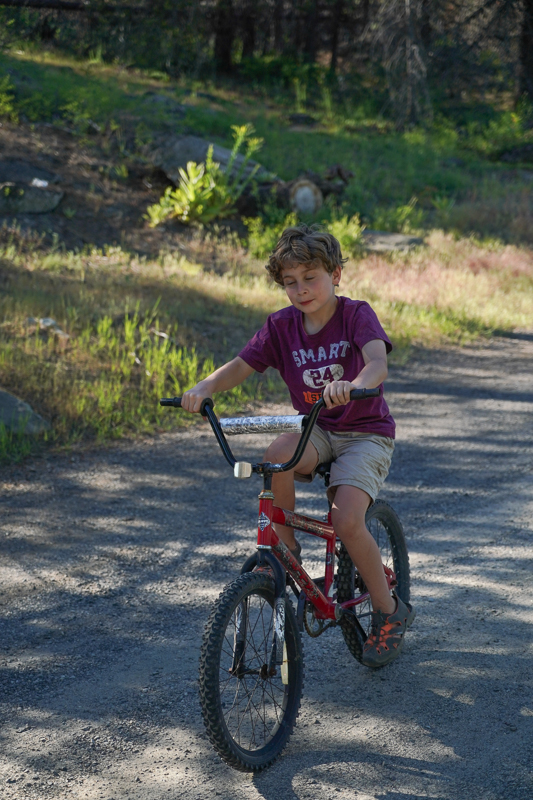
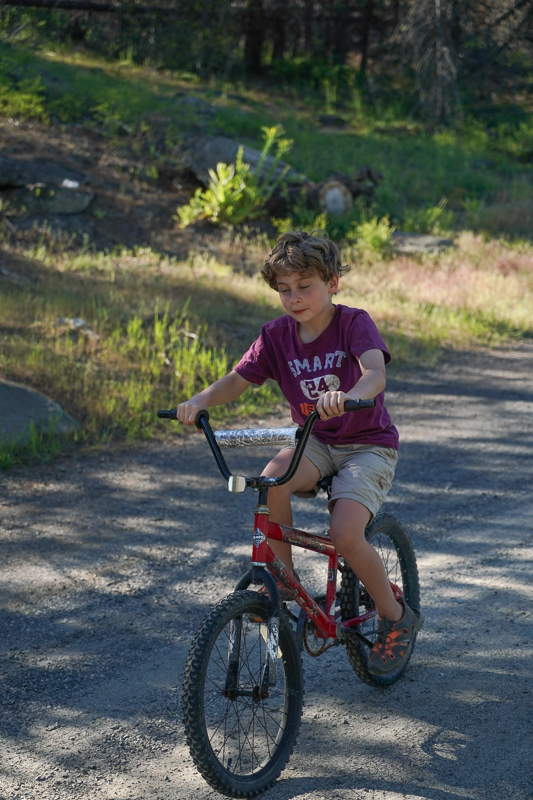
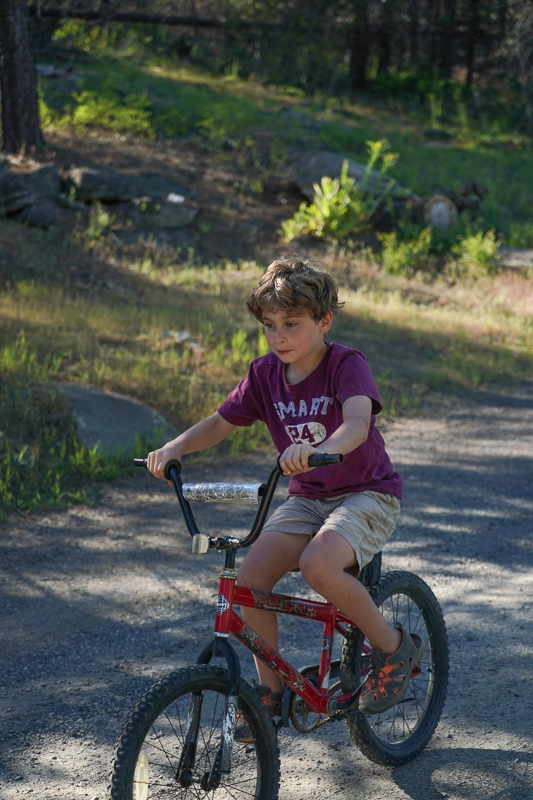
Overall the AF was solid. The keeper rate across the tests was very impressive considering the test involved a subject moving towards the camera. I did have a few shots near the end of the sequences as Jonah moved close to the camera. I believe this was due to the focus point shifting away from his face as he approached due to him being in close proximity. Nonetheless, I feel comfortable wielding the A9 for its main calling: sports and action photography.
Video
This was a fun one. I wanted to give the A9 a challenge and also use it in the wild – not in a controlled environment. I wanted to “run and gun” with it and create a video.
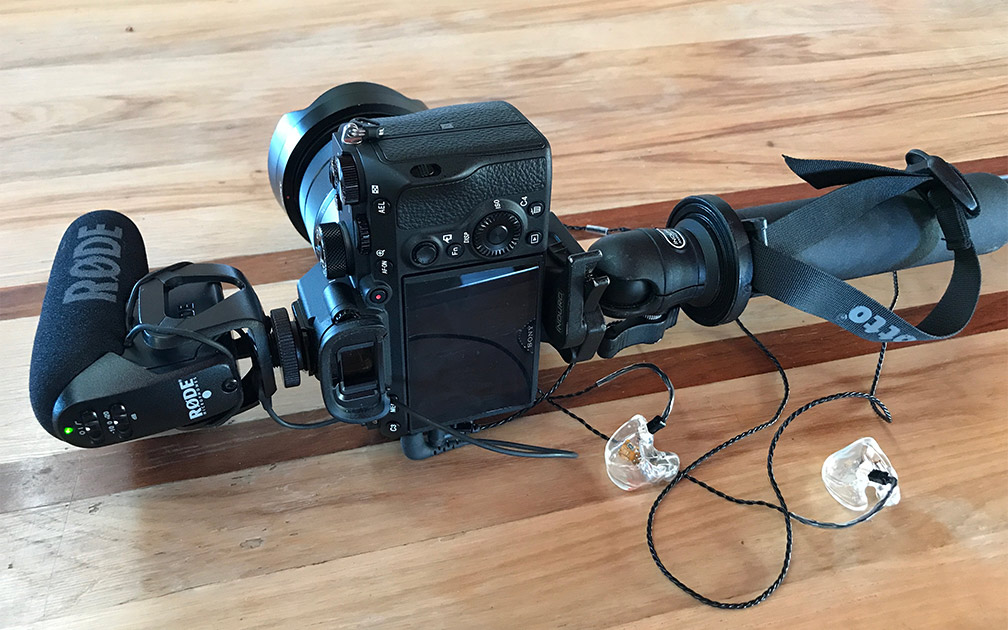 Sony’s A9 setup for video with a Manfrotto monopod, shotgun mic, and headphones to monitor audio
As you might know, I’m traveling full-time across the country from Key West to Alaska over the next couple of years in an RV (I’m currently in Montana just outside of Yellowstone National Park and heading east through the summer to arrive in the northeast for the fall colors). If you’re interested in the travel side of things, you can read more about life on the road at ChaseTheSky.com. But I digress. For the A9 video test, I decided to document my wife Jenni’s first jump with SkyDive West Plains in Washington.
A bit of background on the footage: all the on-the-ground video was captured using the A9. All in-air footage utilized a GoPro Hero 4 Black. As it turns out, you can’t take along your own camera with a skydive crew without a significant number of jumps under your belt. It’s also generally not advisable to drop a $4500 camera out of an airplane with someone who’s jumping out of an airplane for the first time (consider that a pro tip!) Incidentally, Jenni and the A9 both survived the video.
Another note on the footage: I wanted to let the camera have control as I shot. With the exception of my hitting the AF button from time-to-time, I let the camera manage video capture. Additionally, I used a Rode on-camera shotgun mic for the audio (note: if you want to get the low-down on capturing audio, be sure to checkout my Microphone 101 post where I walk you through everything from using your earbud’s mic to a pro audio setup).
Alright, finally, the video is below. Be sure stick around to the end for the outtake, you’ll get a kick out of it.
You’ll notice a short bit of the camera going out of focus at 1:20. I had pressed the AF button to see what the camera would do. As you can see, it sought to refocus. I do think focus would have been fine had I left the camera alone. Would it have been better for Sony to have designed the A9 to ignore my focus request? I’ll say no. I want to be able to focus as I want, and I’m glad I was not overridden by the camera.
You’ll also notice the camera went out of focus around 4:15 as the plane rotated off the ground. This was my fault as I had set the focus point to the upper right hand corner of the viewfinder prior while waiting for the plane to taxi and I did not change the focus point during takeoff. I don’t think I would have had focus issues had I used a wider focus area. It was nice to see the A9 recover nicely and track the airplane as it moved past the camera in perfect focus.
I was also pretty impressed with the camera’s ability to focus on the two parachutes in the air against a blue sky. I expected the camera to struggle here because the subjects were small, but I was happy with the results.
Overall on the video, and keep in mind I’m a photographer not a hardcore videographer, I was impressed with the A9‘s ability to focus during video and to handle shifts in dynamic range. You’ll note several times during the in-car footage where the available light shifted, yet the A9 handled the changes well.
The Gestalt of it All
There is no doubt that the Sony A9 is an impressive camera. The AF system is a solid performer even in low-light, and the high resolution no-blackout viewfinder delivers a low-friction shooting experience.
The improvements in battery life feel almost like a return to DSLR battery longevity and the new controls and menus make the camera more intuitive to use than Sony’s A7 line.
But specs, features, button placements, and the like only tell part of the story. What really matters day-to-day is how does the camera feel. Is it in your way? Does it help you get the job done? Is it easy? Is it cumbersome?
All-in-all I’ve really enjoyed the A9 and have no hesitation recommending it- especially for wedding and sports photographers. Yes I have quibbles with the AF ON button design and placement, but overall the camera is intuitive to use and it let’s me easily go about the business of capturing images. You don’t have to work around it. It works with you to let you do what you need to do.
Where to buy:
Sony A9 at B&H
Sample Images
Below are edited images created specifically for this review from a couple of nights in, and around, Seattle.
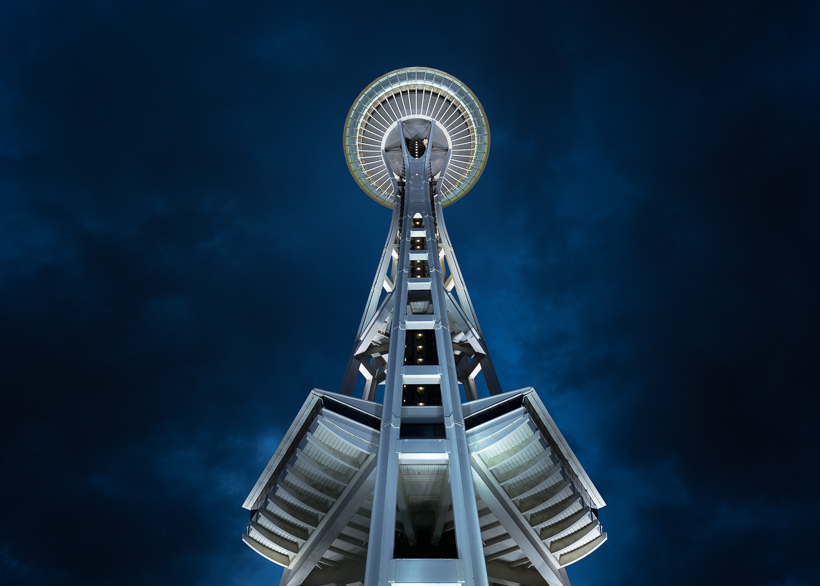
Seattle’s Space Needle at blue hour

Frank Gehry’s Museum of Pop Culture & The Space Needle
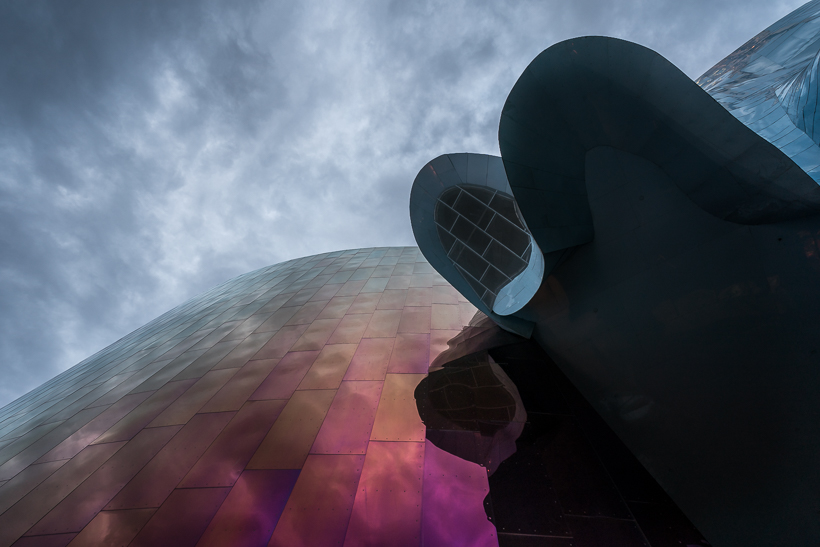
A look up at the Museum of Pop Culture

Alien Edifice: the Museum of Pop Culture
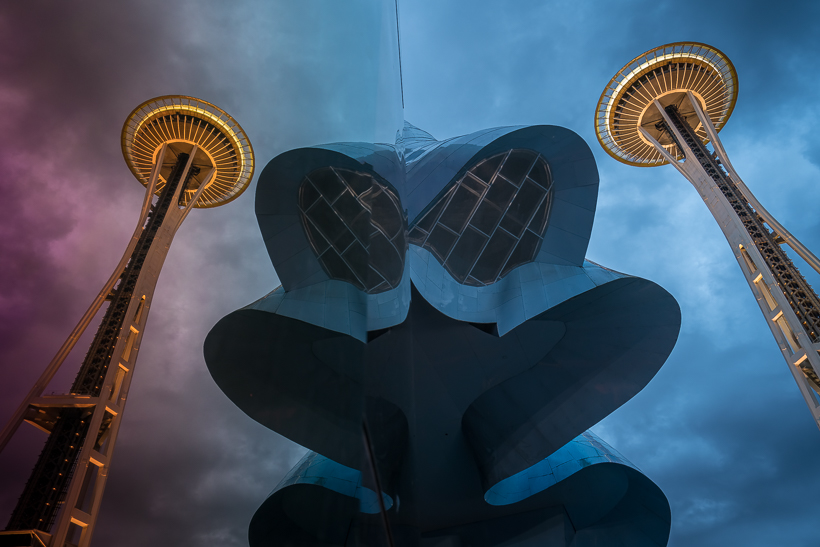
A reflection of the Space Needle at the Museum of Pop Culture
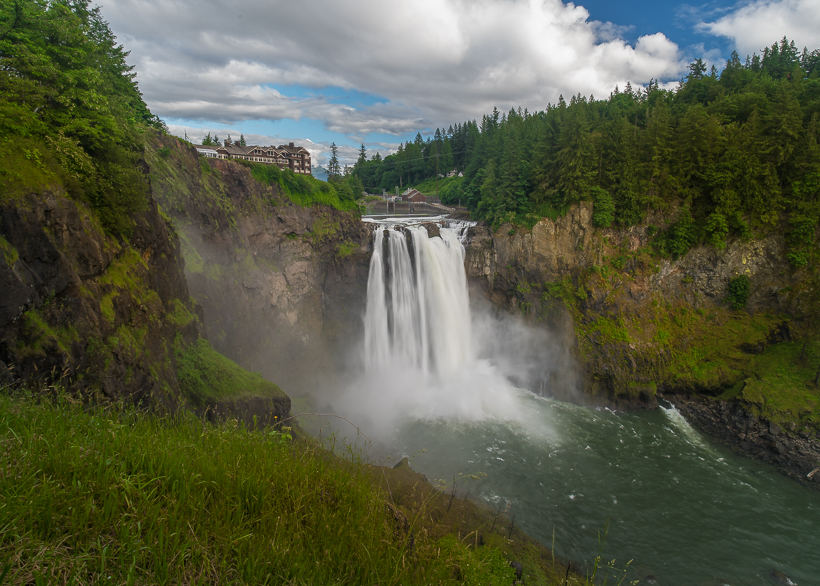
Snoqualmie Falls
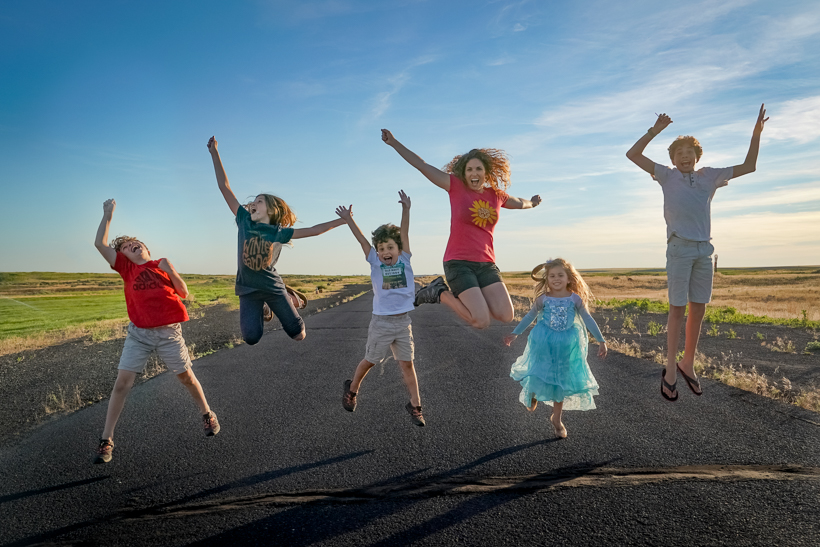
Having 20 frames per second gives you the opportunity to capture the right moment. This, by the way, is my family Jenni’s skydive. This is the relief after the fear shot (checkout how scared she was here)
Feb
17
2017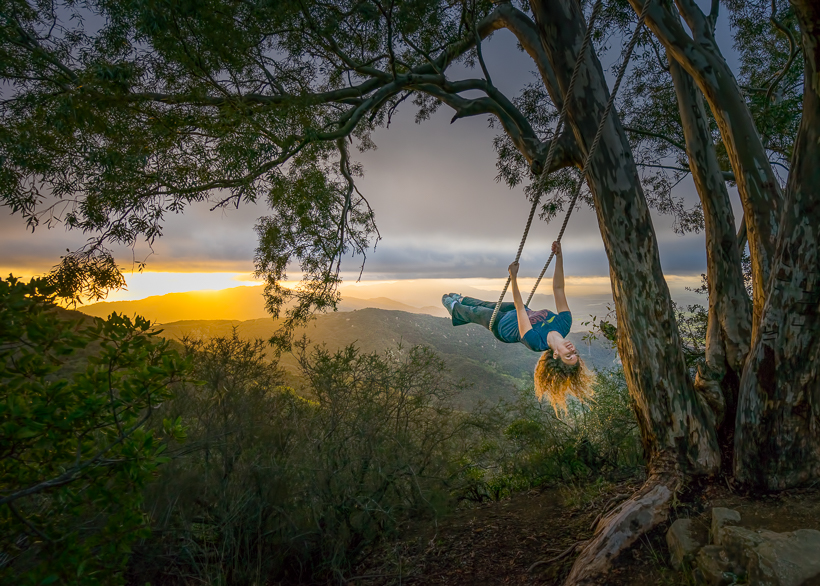
Jenni rides a swing over the edge e of the St. Ynez Mountains at the Ruins of Knapp’s Castle
I can’t adequately describe what an absolutely magical area of the St. Ynez mountains outside of Santa Barbara this is. It starts with a walk overlooking the mountains on a dirt road to the ruins of Knapp’s Castle (a mansion abandoned after a fire in the early 20th century). After the quarter-mile or so walk, off to the side of the mansion ruins, is this area with two rope swings. We made it there perfectly at sunset- I couldn’t have asked for better light (timing shoots is something Jenni has been getting really awesome at recently!)
Everyone rode the swings while I did my camera thing to get this shot of Jenni swinging with abandon over the edge.
We stayed well past sunset until the clouds rolled in (we literally walked through the clouds to the top of the mountain back to car and drove down to our campsite.)
Jan
16
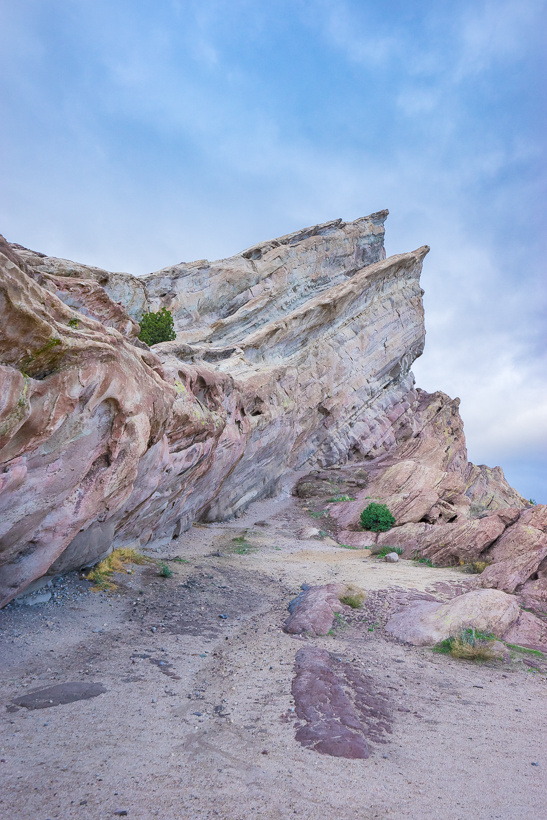
2017If you’ve seen Star Trek or Westworld you’ve seen these rocks. They have been featured in Star Trek the Original Series (season 1, episode 18 “The Arena”) as well as in the 2009 film (the planet Vulcan).
More recently they were featured as a film location in episode 4 of HBO’s Westworld (“Dissonance Theory). It’s an awesome place to hike and hangout with a lot of short hikes and climbs featuring mountains in the background.
I’ve been at this location twice in the last week or so and may go there again. There’s so much to see. I have a few more shots from here that I’ll be posting over time.
‘
Jan
12
2017It’s been a while since I’ve posted images as I’ve focused more on reviews and basically posted images on Facebook, Instagram, etc instead of here. I feel like I’ve been neglecting the blog. Good news, I have a tons of images to post so strap in- a lot of images are on the way.
Our RV (aka battlestar) is currently in Soledad Canyon, California. Coming up are Santa Barbra, Joshua Tree and Las Vegas. So yep, more stuff coming (and that’s just the next couple of months; might even been heading to Yosemite in the fall/early summer)
While I’m in California, this image here is Paris Mountain, SC. I photographed it at the early stages of the trek way back in October. It was’t the image I thought I’d capture that day, but sometimes you just happen on a scene that’s the one.

Sep
18
2016Failure is an Option
I’ve been wanting to put together video reviews for a while, so I tried a quick test by shooting a chat about my DJI Phantom 3 Pro. As you can see (and hear), it did not go so well. Actually, it went significantly worse than well (arguably, it went significantly worse than bad!). The footage itself was good, but the audio left a lot to be desired.
So, audio became a quest; I wanted to capture good audio and I was going to get to the bottom of it – one way or another. This video is the result of that quest: a brief tutorial and intro for anyone asking themselves the question: how can I record good audio for video?
What’s out, What’s in
You can flat-out forget about relying on your camera’s built-in mic: whether its on your phone, iPad or mirrorless/DSLR. Built-in mics are designed to pickup everything and anything. Audio, in a sense, is similar to photography. It’s said a good photo is more about what is left out than what is included. The same applies to capturing audio: it’s what’s left out that makes good sound. You only want to hear what you want to hear – not everything else in the environment.
Mics: some options
In short, you have 3 options: lavaliers, shotguns, and boom mics.
Lavaliers are what’s commonly known as clip-on mics. They sit close to speaker’s mouth to capture the audio. This allows for the ambient noise to be left out (though a lavalier can be lowered on the wearer to allow more environmental sounds to be picked up).
Shotgun mics are mounted on top of the camera and are used commonly when you have multiple speakers talking directly at the camera. In such situations, you don’t want to capture and mix audio from multiple lavaliers. A shotgun is what you’ll go for. Keep in mind that a shotgun mic is directional: it’ll capture what’s in front of it. The better it is, the better it is at keeping the “cone” small.
Boom mics are basically highly directional shotguns on an extension pole (aka the boom). Just about any mic can be a boom mic really- the boom just gets you closer to the speaker and allows you to turn the mic sensitivity down so it picks up less of the sound in the environment. Just about every movie you’ve seen has used a boom mic for the audio. Booms are great, but not very practical for most YouTubers as booms are typically at the higher end of the price scale- not to mention you’ll also need an assistant to hold the mic and keep it pointed at you.
Let’s not forget HandHeld mics: handhelds are great because you can be right up to the speaker and eliminate ambient sound. They also allow you to a great deal of mobility and the ability to pickup audio from multiple speakers (i.e. they’re great for interviews). They suffer, however, from the disadvantage of being, well, handheld! I can never use a handheld, it would drive me insane as I am pretty animated and use my hands a lot when I speak. You’d never hear me because the mic would be everywhere except near my mouth.
What’s In the Tutorial
Lavaliers
- Apple EarPods ($26) – Yah, the ones that came with your iPhone or iPod)
- MXL MX-160 ($59)
- Rode SmartLav+ ($79)
- Sennhesier Clip-Mic Digital ($199)
Shotgun Mics
Booms
- Mic: Rode NTG3 ($699)
- Blimp: Rode Blimp ($299) – this is not a mic, but a mount and wind screen for the NTG3
- Booms
I also also had a couple handhelds, most notably the Sennheiser MD-46.
Notes on the Audio
You can hear the lavaliers and shotguns in the video- be sure to check it out if you haven’t already. My two favorite mics were the Rode SmartLav+ and the Sennhesier Clip-Mic Digital (powered by Apogee). The Apple EarPods were a surprisingly passable option – just about everyone has a set and using them to capture audio is way better than just relying on your camera’s mic. If you’re the “I like life hacks” type: you now have a new trick up your sleeve!
The SmartLav+and Clip-Mic Digital were pretty close. The Sennheiser was the stronger mic, but if you’re on a budget, you can’t go wrong with the SmartLav+.
As for shotguns, the Rode VideoMicro and VideoMic Me are basically the same mic with different mounting/connection options. They were pretty close in sound. I did prefer the Rode VideoMic Go even though it is the largest of the three. I also think the two other mics would benefit from a windsock (aka windscreen aka dead kitten) and would yield better audio if used with one. The said, the nice thing about the VideoMic Me is you don’t need a mount for it – just plug it into your phone/iPod and you’re good to go. Keep in mind you can easily use any shotgun with your phone if you use something like the iOgrapher.
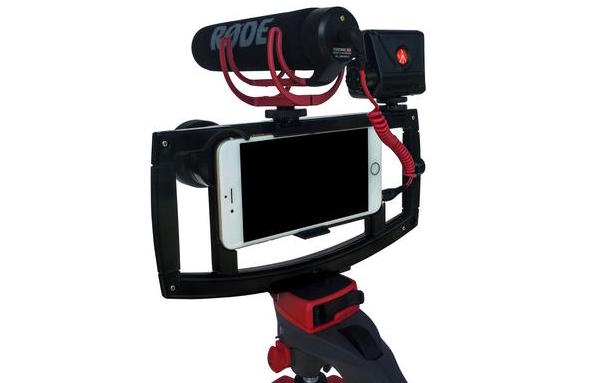
iOgrapher with Mic and Light
As expected, the Rode NTG3 performed exceptionally well. I didn’t demonstrate this in the video, but even a small turn of the mic resulted in a change in amplitude. Be sure to correctly point the mic or your audio will peak and valley all over the place! Incidentally, the Auray ABP-47B boompole was fantastic. The built-in cable made connecting, and handling, the NTG3 a breeze.
And, while we’re on the subject of boompoles, the Rode Micro Boompole Pro ($99) was incrediably light! You barely know it’s there – especially when using it with the VideoMicro.
What should you buy
This really depends on what you’re doing. If you’re just starting out, I’d say start with your earbuds and see if they meet your needs. From there, you really can’t go wrong with the Rode VideoMicro (if you want to go the shotgun route). The Clip-Mic Digital, again, would be my choice for a lavalier.
Let me know what you end up with, or just ask any questions you have below in the comments.
May
18
2016
A Portable Motion Control Head
Motion control gear for video and timelapse isn’t known for its portability. Motion control heads have been getting smaller, and more portable, in recent years. Yet, finding a solid, small, but easy to use motion control head isn’t, well, easy.
New to the fray is the Syrp’s Genie Mini. Priced at $249, it’s relatively inexpensive for a feature-rich single-axis motion control head that can handle 8.8lbs panning and 6.6lbs titling (more than enough capacity for most camera bodies) . It’s also small (really small). It’s Just take a look at how it compares to its big brother (sister?) the Syrp Genie, Radian from Alpine labs, and an iPhone 6s.
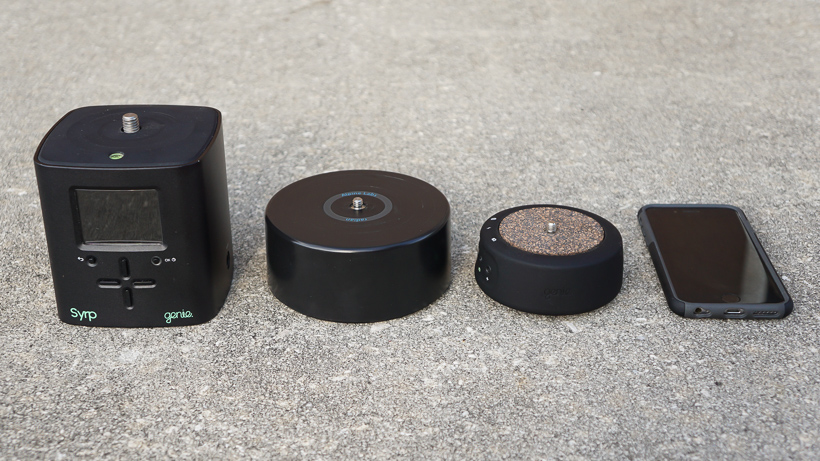
From left to right: Syrp Genie, Alpine Labs Radian, Syrp Genie Mini and iPhone 6s
Elegant Design
At 3.6” x 1.56” it doesn’t take up a lot of room in my camera bag. It’s also pretty light (8.1oz/230g) and doesn’t add much weight to my gear bag. That’s awesome for long hikes making it easy to want to bring it along.
It also sports an attractive design aesthetic. The rubber shell is thick, yet smooth, and soft, to the touch. I was initially put-off by the cork top (preferring the minimalist black rubber top of its larger sibling,) but the mini’s cork retro styling grew on me. From a feel perspective, it feels solid and has a nice heft to it. There’s also no wiggle/play in the head which makes it well suited for captures on windy days (something the Alpine Radian struggled with.)
Bluetooth Everything
Looking at the Genie mini from a features perspective, one stands out: and that’s Bluetooth programmability (with the free Syrp provided iOS and Android apps). All programming, including firmware updates, is handled by your phone/tablet. The app even tells you how much battery you have left- a nice touch.
Programming Features
If you’ve used the Genie, the Genie mini will be very familiar to you from a programming perspective. You can use the app to create a timelapse sequence or video. You can decide where the mini begins the sequence and ends it. You also have options for easing-in and easing-out and, when shooting timelapses, you can specify how long the mini will hold the shutter down (allowing for an HDR sequence to be captured.) Also, if you get confused along the way, Syrp included tutorial videos in the app. So if you’re setting up a timelapse and get a bit lost, just click on “More Info” and watch a video to figure out what you need to do.
Take a look below at the app screens. I have screens below for timelapses and video to give you a feel for how the app works.
-

- Setting up a sequence
-
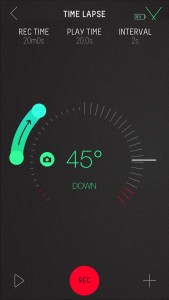
- Defining a timelapse
-
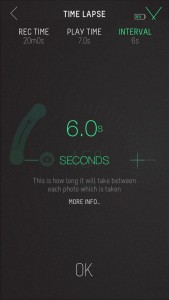
- Set the interval by swiping right or left.
-
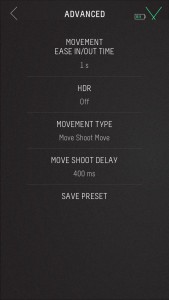
- Advanced timelapse options (including HDR)
-
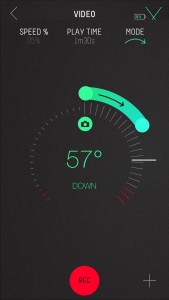
- Creating a video
-
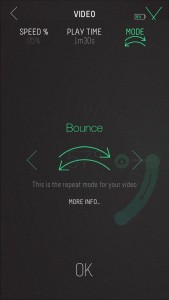
- Ability to bounce the video
Single-Axis is cool, but Multi-Axis is Cooler
The mini is a capable device in its own right, but pair it with its larger sibling and you can pan and track. Syrp even offers an interface cable allowing the two heads to talk to one another.

The Genie paired with the Genie Mini
That’s pretty cool, but add another Genie mini, and Syrp’s Pan and Tilt Bracket, and you’ll be able to create multi-axis sequences. Both Genies will pair with your phone and the app will identify one as the pan head and the other as the tilt head. From there, you can program your sequence and be off shooting. Take a look at the video from Syrp explaining all this. It’s seriously cool.
Should you buy it?
Put the Genie mini in the highly recommended category. It’s small, elegant, feature-rich, and can be used as part of an ecosystem of devices allowing for a wide range of multi-axis captures. Start with one device and add-on as needed.
Syrp has been around for a few years now and has been releasing one solid, well-thought-out, product after another. The company has an eye for design and it shows. The genie is an amazing little device for your gear bag.
Where to buy
B&H $249
Aug
27
2015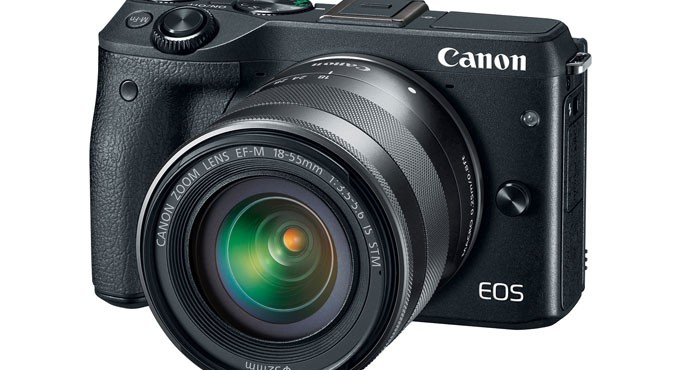
Another Canon Me too
What was Canon’s big announcement yesterday? The release of the 35 1.4LII (since the 35 1.4L has been trounced by the Sigma 35 1.4 DG HSM A) and the release of the Canon M3 (as Sony runs away with the mirrorless market).
I have no doubt the 35 1.4LII is going to be a strong contender. I’m sure the reviews will show a marked improvement in sharpness and construction. What I do have doubts about is the Eos M3. Scratch that, I don’t have doubts, I’m calling it now: the Eos M3 is yet another disappointment. Take a look at the how the camera is described by canon:
“Designed to inspire, the EOS M3 digital camera brings true EOS performance and image quality to a compact, stylish and elegant package. A pleasure to operate, with the sophistication to create stunning still and moving images, the EOS M3 is an ideal EOS for many applications, such as portraiture, landscape, travel and everything in between.”
In a world: boring. The M3 is basically a T6i sensor in a small form factor and still lags behind offerings from Sony and Olympus. You want a viewfinder? Slap it into the hotshot! Full Frame Sensor: no. Max frames per second: 4.2 (compare that to the Sony A6000’s 11fps, for example.)
A sign of things to come?
The only good silver lining here is htis could be Canon waking up and realizing it needs to up its mirrorless game. But will there be anyone with Canon glass around to care? There’s no doubt there will be Canon shooters out there, but will those who made the “switch-to-sony” come back? Switching systems only happens for drastic reasons (who wants to sell their lenses and start all over?). Can Canon release a mirrorless that’s worth it? That remains to be seen- the M3 isn’t it.
Jul
30
2015
I never thought I’d write this post. I’ve been with Canon for years; my first ‘real’ film camera was a Canon, my first DSLR and every camera since until this week was a Canon. I owned several L lenses; I never thought I’d be here writing about switching platforms and ‘going Sony’, but here we are and that’s exactly what I’m writing.
Three days ago, Canon marked down its 3rd quarter outlook due to weak digital camera sales. How big was the hit? Just a minor $10 Billion dollars! Now, I’ve been thinking about writing my “breaking-up with you Canon post” for a few days, and now with the Canon earnings outlook, I thought: “yah, I better get on this”. I figured I should tell Canon why just a few thousand dollars of the big $10 Billion were not coming from me. So, how did we get here?
I remember when the first few micro 4/3 cameras made it to market in 2005/2006. “Mirrorless, bleh,” I remember thinking. Sure these new-fangled mirrorless cameras were small and light, but micro 4/3? I couldn’t understand why anyone would want a sensor even smaller than APS-C. Who would want a smaller, noisier, sensor just to save a bit of carry weight? Besides, how good could the lenses be- Canon has a history of excellent lenses? I rightly outright dismissed the early Olympus and Panasonic cameras. No serious photographer would really go mirrorless.
In June 2010, though, Sony released the Nex-7 and things got interesting. APS-C sensor, 10 frames per second, OLED viewfinder, in-camera HDR, whoa. Sure the lens collection wasn’t big, but Zeiss lenses…now we’re talking! Tempting, but still just APS-C (I wanted big, clean, pixels!). I’m wasn’t about to dump my 5D Mark II. The Nex-7 was compelling, but it wasn’t compelling enough. Besides, I had a big Canon lens investment. I wasn’t going to switch but, for the first time, I thought: “not bad mirrorless camp, not bad.”
As one Sony Nex camera after the other was released, I thought: “Canon is going to respond- there’s market here. I wonder what Canon will do?” And, what did Canon do? Canon waited a full two years after the Nex-7 before announcing the EOS M- a camera as compelling as dental surgery. It was as if Canon said: “Let’s think of the worst camera we can make, and let’s make it mirrorless. Maybe then those kids out there will see the error of their ways and buy DSLRs.” Predictably, no one bought the EOS M. The AF was slow, the ergonomics were less than impressive, and no one was interested- at least I wasn’t
Things got more interesting just a few months after the announcement of the EOS M. In September 2012, Sony announced the first full-frame mirrorless: the RX-1. Ok, it had a fixed 35mm f/2 lens, but still: it had a full-frame sensor (and that was a Zeiss lens boys and girls.) What did Canon do? Canon waited a full year before releasing the less than compelling EOS M2 (a me-too 18megapixel APS-C with slightly improved AF and built-in wifi). Mind you Canon announced the M2 just 3 days before Sony announced the A7 and A7R (24 megapixel and 36 megapixel full-frame pro class cameras that turned the world upside down).
Some would call the A7R the iPhone moment for the Canon blackberry. I wouldn’t go so far. Canon still has a fantastic product line, but Canon was dug in and, it seemed, worried about cannibalizing its own product line.
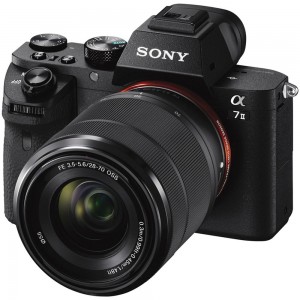
Sony’s A7II full-frame mirrorless just made it into my camera bag
Canon, it seemed, just wasn’t seriously interested in the mirrorless market. But, guess what, photographers were. Specifically, I was. I wanted a small, light, full-frame body- not to mention the host of features Sony was touting (focus peaking, manual assist, OLED EVF, the list goes on). Canon, wants me to buy a DSLR. I looked at the 5D Mark III many times, but I can get a larger sensor, excellent image quality (not to mention fantastic dynamic range) and a host of features from the Sony A7II. And so, I write this as the last few bits of my Canon gear sit on eBay. Last week marked the farewell to my 5DMKII and all my L lenses. It also saw the purchase of a Sony A7II and Zeiss lenses (Zeiss 16-35 f/4 FE and Zeiss 24-70 f/4 FE.)
Canon: I wanted it to workout, but it didn’t. Maybe one day our paths will cross again, but right now, I don’t see it happening. Switching platforms was not easy and if Sony keeps on innovating like Sony has been (hello A7RII, you beautiful beast), I won’t switch back. Canon now has 10 billion reasons ($) to build a pro-grade mirrorless camera and I hope Canon does as competition can only make things better. Who knows, maybe I’ll pickup a Canon again someday, but not now. Now, I’m building my Zeiss lens collection.


