Sep
18
2016Failure is an Option
I’ve been wanting to put together video reviews for a while, so I tried a quick test by shooting a chat about my DJI Phantom 3 Pro. As you can see (and hear), it did not go so well. Actually, it went significantly worse than well (arguably, it went significantly worse than bad!). The footage itself was good, but the audio left a lot to be desired.
So, audio became a quest; I wanted to capture good audio and I was going to get to the bottom of it – one way or another. This video is the result of that quest: a brief tutorial and intro for anyone asking themselves the question: how can I record good audio for video?
What’s out, What’s in
You can flat-out forget about relying on your camera’s built-in mic: whether its on your phone, iPad or mirrorless/DSLR. Built-in mics are designed to pickup everything and anything. Audio, in a sense, is similar to photography. It’s said a good photo is more about what is left out than what is included. The same applies to capturing audio: it’s what’s left out that makes good sound. You only want to hear what you want to hear – not everything else in the environment.
Mics: some options
In short, you have 3 options: lavaliers, shotguns, and boom mics.
Lavaliers are what’s commonly known as clip-on mics. They sit close to speaker’s mouth to capture the audio. This allows for the ambient noise to be left out (though a lavalier can be lowered on the wearer to allow more environmental sounds to be picked up).
Shotgun mics are mounted on top of the camera and are used commonly when you have multiple speakers talking directly at the camera. In such situations, you don’t want to capture and mix audio from multiple lavaliers. A shotgun is what you’ll go for. Keep in mind that a shotgun mic is directional: it’ll capture what’s in front of it. The better it is, the better it is at keeping the “cone” small.
Boom mics are basically highly directional shotguns on an extension pole (aka the boom). Just about any mic can be a boom mic really- the boom just gets you closer to the speaker and allows you to turn the mic sensitivity down so it picks up less of the sound in the environment. Just about every movie you’ve seen has used a boom mic for the audio. Booms are great, but not very practical for most YouTubers as booms are typically at the higher end of the price scale- not to mention you’ll also need an assistant to hold the mic and keep it pointed at you.
Let’s not forget HandHeld mics: handhelds are great because you can be right up to the speaker and eliminate ambient sound. They also allow you to a great deal of mobility and the ability to pickup audio from multiple speakers (i.e. they’re great for interviews). They suffer, however, from the disadvantage of being, well, handheld! I can never use a handheld, it would drive me insane as I am pretty animated and use my hands a lot when I speak. You’d never hear me because the mic would be everywhere except near my mouth.
What’s In the Tutorial
Lavaliers
- Apple EarPods ($26) – Yah, the ones that came with your iPhone or iPod)
- MXL MX-160 ($59)
- Rode SmartLav+ ($79)
- Sennhesier Clip-Mic Digital ($199)
Shotgun Mics
Booms
- Mic: Rode NTG3 ($699)
- Blimp: Rode Blimp ($299) – this is not a mic, but a mount and wind screen for the NTG3
- Booms
I also also had a couple handhelds, most notably the Sennheiser MD-46.
Notes on the Audio
You can hear the lavaliers and shotguns in the video- be sure to check it out if you haven’t already. My two favorite mics were the Rode SmartLav+ and the Sennhesier Clip-Mic Digital (powered by Apogee). The Apple EarPods were a surprisingly passable option – just about everyone has a set and using them to capture audio is way better than just relying on your camera’s mic. If you’re the “I like life hacks” type: you now have a new trick up your sleeve!
The SmartLav+and Clip-Mic Digital were pretty close. The Sennheiser was the stronger mic, but if you’re on a budget, you can’t go wrong with the SmartLav+.
As for shotguns, the Rode VideoMicro and VideoMic Me are basically the same mic with different mounting/connection options. They were pretty close in sound. I did prefer the Rode VideoMic Go even though it is the largest of the three. I also think the two other mics would benefit from a windsock (aka windscreen aka dead kitten) and would yield better audio if used with one. The said, the nice thing about the VideoMic Me is you don’t need a mount for it – just plug it into your phone/iPod and you’re good to go. Keep in mind you can easily use any shotgun with your phone if you use something like the iOgrapher.
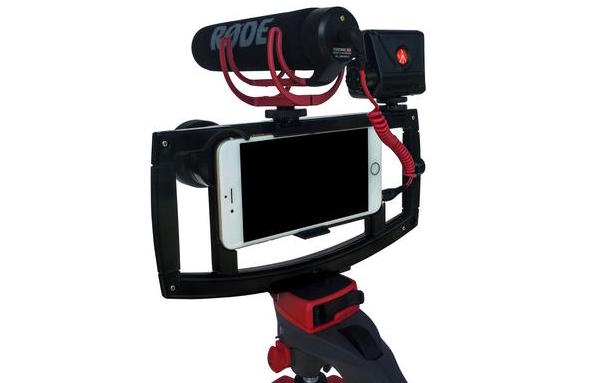
iOgrapher with Mic and Light
As expected, the Rode NTG3 performed exceptionally well. I didn’t demonstrate this in the video, but even a small turn of the mic resulted in a change in amplitude. Be sure to correctly point the mic or your audio will peak and valley all over the place! Incidentally, the Auray ABP-47B boompole was fantastic. The built-in cable made connecting, and handling, the NTG3 a breeze.
And, while we’re on the subject of boompoles, the Rode Micro Boompole Pro ($99) was incrediably light! You barely know it’s there – especially when using it with the VideoMicro.
What should you buy
This really depends on what you’re doing. If you’re just starting out, I’d say start with your earbuds and see if they meet your needs. From there, you really can’t go wrong with the Rode VideoMicro (if you want to go the shotgun route). The Clip-Mic Digital, again, would be my choice for a lavalier.
Let me know what you end up with, or just ask any questions you have below in the comments.
Nov
20
2012Controlling noise in HDR is no easy matter as HDR applications invariably multiply noise . There are several noise reduction opportunities within the editing workflow and careful consideration must be undertaken in deciding “when” and how much noise reduction must be applied to each image. As you’ll see in the video, my preference is for denoising before tonemapping then applying noise reduction sparingly and selectively afterwards as/if needed.
For most images Lightroom’s noise reduction controls are a good choice, but for full control over denoising (especially for underexposesd or night images), I use Topaz Denoise. Dont’ get me wrong, Lightroom is a top-notch tool and it does a pretty good job, but it’s limited; It does not allow you to control the application of noise reduction to the highlight and shadow areas of an image or control over color channels. Topaz gives you a granular control for when you need it and I find it does a better job maintaining details because of the granularity of its controls. It also does give you some presents to use as starting points to get you going (I go over this in the video)
While the video is focused on using Topaz Denoise, I also talk about my camera setup and considerations during shooting. After the session, I was asked to clarify my camera setup. Here’s what I recommend:
Register Custom User Settings
These are the C1, C2, C3… etc on your dial (if you’re not sure how to do this, take a look here). I setup C1 on my camera for f/8, 0.5″, ISO 100, Auto Exposure bracketing (-2,0,2), White Balance to tungsten, and Long Exposure Noise Reduction. This basically is my “HDR Shooting Mode” so to speak. This makes my life easier as I don’t have to fumble around with settings when I’m ready to shoot. Keep in mind: these aren’t absolute settings; they are a starting point. A tip: I start with the settings I mentioned at C1, the adjust to the scene I’m shooting and register to C2 that way if my camera “goes to sleep” I can quickly start at where I need based on my lighting conditions.
Shoot the Lowest ISO Possible
The same rules for minimizing noise when not shooting HDR apply: your ISO should be as low as possible to accomodate the shutter speed you are looking for. As a general ISO 100-200 is where I’m typically at. If time is not an issue, i’m at 100. If I want to half my shutter speed, I just double up to ISO 200.
Alright, for the rest, you’ll have to watch the video. Keep in mind, I focus mainly on Topaz Denoise and noise reduction. I do go over Photomatix and tonemapping but only briefly and not in detail; I am putting together a tutorial on Photomatix that’s coming up. In the meantime, if you’re looking for a discount code use: CertainPointofView for 15% off Photomatix and let me know if you have questions.
Dec
29
2011
Fireworks can be very frustrating to shoot especially if you’re trying to photograph them using full auto mode on your camera. If you’ve ever done so you’ve either ended up with blurry, shaky photos, or photos in which your flash fired for no good reason.
In this guide, I’ll share step-by-step tips that will help you nail fireworks every time.
What you’ll need
- A good tripod. There’s just no way around it, a good solid tripod will give you the stability you’ll need to for shooting the long exposure shots necessary to capture good firework photos. I used the Induro AT-213 with the Manfrotto 498Rc2 Head
- Cable release/remote. You can make do without this and use a delay timer in your camera, but your shots will be hit-or-miss. So get a remote in order to capture the moment. I use the Vello Wireless Sutterboss (there’s a Nikon version too). It’s pretty pricy, but it does a good job.
- Watch/digital timer. This is not an absolute necessity, but you’ll want to use something to get the correct shutter speed. My cable release has a timer so that solves the problem for me. You can also just set a predetermined exposure time.
Got it all? Wonderful, let’s get working.
Location
Know your location. You can’t capture good images unless you know where the fireworks will be. In the shot above, I scouted the location early in the morning, tried different vantage points and lenses before deciding to finally on where place my tripod. There is no substitute for this step. Scout early, setup early.
Stability
You will need a solid tripod, that’s obvious. Be aware though, just because your tripod is stable doesn’t mean it’ll remain that way – especially if you’re in a crowd. Know where your tripod legs are and try to stand behind one of them. If you can, have friends at each of the other legs to prevent the crowd from bumping your tripod and ruining your shot.
Embrace Manual
Don’t be afraid of the big bad “M” on your dial. It seems scary but, it gives you full control. What you are aiming for is long exposures, this means small apertures and long shutter speeds coupled with low ISO. So set your dial to “M” and get ready. Your camera will not make the right decisions when shooting fireworks, it just doesn’t know what it’s looking at. Take control, you’ll be happy you did.
Aperture
Somewhere between f/8 to f/16 is where you want to be. There’s no “rule”, ambient light will play a role so use your judgement keeping in mind that you’re looking for an exposure between 8-30 seconds. (try f/8 for 11 seconds to start and adjust down from there).
ISO
Stay under 400 and save yourself from noise. You’re already going to have noise because of the long exposure so 100-200 will do (100 is better).
Shutter
Again, you’re looking for a long exposure. You’ll be setting your shutter speed to bulb, but not yet. First, set your shutter manually keeping in mind how much ambient light/surroundings you want in your shot. In the case with the shot above, I wanted to be sure I had the castle well illuminated and a shutter speed of about 10sec or so. Then, I set my shutter and played with my ISO and Aperture.
Now, remember you’ll want to use the cable release/remote and bulb. So take a few test shots and check your image. Note the shutter speed you used as you’ll want to use it during the show. Once you know what speed you want to be at, set your shutter to bulb and set your watch/digital timer. More on this later.
Focus
Focus is going to be difficult – especially if you’re just looking at empty sky. If you have something in the foreground to focus on that’s great. Just focus then be sure to turn off autofocus once your focus is locked in. Turning off autofocus is critical (I use back-button focus so my camera never focuses when the shutter button is depressed. If you don’t want to dive into the world of back-button AF, just turn off our autofocus); if you don’t do this, your lens will hunt trying to lock in focus and you’ll probably end up missing the shot or getting a best guess from the lens and ending up with a blurry photo.
If you don’t have something in the foreground then you’re off to focusing manually. Do the best you can and make sure your autofocus is off. Make no mistake: focus at night is tricky and there are no rules to save you. You’re just going to have to get good at it with experience. Sometimes focusing on a person in the crowd in the middle of your scene can help; that’s a good trick and it can help you.
Flash
Turn it off, you don’t need it if you’re just trying to capture fireworks.
Ok, whew. So far so good, now it gets fun.
White Balance
User your discretion but manually choose your white balance. Tungsten is a good choice, but it depends on the temperature of the ambient light you have and the look you are going for. Stay away from auto white balance as it’ll just cause havoc with your shot-to-shot consistency. Ah, the joys of manual heh.
Mirror Lockup
Turn it on to make sure your mirror does not cause vibrations as it is moving out of the way for the shutter to open. Another alternative is to just use LiveView as that locks up your mirror. You can then just look at your LCD to see the scene.
Long exposure noise reduction
Personally, I like using it, but I may be in the minority here. What is it? Basically, after your image is captured, your camera will close the shutter and capture an additional image at the same shutter speed. The second image will contain noise that is subtracted from the original image you captured. The result: nice clean images. The downside: a 10 sec exposure becomes a 20sec exposure and you’re missing a lot of your fireworks show.
Do you want to use it? It’s up to you. If you have good noise reduction software, then turn it off and experiment and see how it goes. If not, turn it on and sacrifice part of your show. This, again, is your decision.
Tripod Part 2
If you’re not above everyone’s heads, think about extending your center column keeping in mind you’re losing stability. All your other settings are locked in now, so this is a good time to do this if you deem it necessary.
Finally, let’s Shoot!
Ok, so now you’re ready to go. Experiment with shutter speeds. You know what shutter speed will correctly expose for your ambient light, but you’re shooting bulb so you can try different shutter speeds. From here you’re just going to have to experiment but keep the following in mind:
1) Try to get the moment just before the fireworks explode
2) Some portions of the show will be brighter than others, so adjust your shutter speed accordingly. This is especially true during the finale. Remember, you’re on bulb so you get to open and close the shutter.
3) Use your timer/watch. You can guess and just open/close the shutter manually but you won’t be as accurate.
Well, there you go. The steps above should get you well on your way to shooting good solid fireworks images. Drop me a comment if you have questions or with links to images you captured. I’d love to see what you come up with.


