Disney Fantasy in the Caribbean

Disney Fantasy Cruise Ship

This is the Disney Fantasy (Disney Cruise Line’s newest ship) docked in Cozumel, Mexico in late September.  I took this shot after a long day at port immediately before boarding to depart for Grand Cayman.

Cozumel was a fun port of call – complete with Mayan Ruins at San Gervasio; now they’re not what one would imagine Mayan ruins to be (tall pyramids nestled in a valley, etc).  They’re about 35 minutes out from the port and they’re easy to get to and walk around.  Everyone will tell you the mosquitos are really bad, but they really aren’t  – though this could have been a function of being out there in late September.

As for the Fantasy, the ship is, in a word, amazing.  It’s beautiful, clean, and very well maintained.  It’s not hard to see why it’s the jewel in the Disney Cruise Line  fleet.  I won’t do a full review here but I will recommend mousesavers for a good discussion on DCL and the Fantasy.

TriggerTrap Review: Control your camera from your phone

TriggerTrap Photo 1

What is it?
You have phone; you have a camera. Wouldn’t it be nice to be able to trigger your camera from your phone? And, since your phone is, in essence a miniaturized computer, wouldn’t it be great if you had an app enabling you to use your phone as a programmable intervalometer and shutter release? Also, if you could use your phone as a trigger, wouldn’t it be interesting if you could use your phone’s sensors to trigger your camera based on sound, vibration, and so on?

That, in a nutshell, is TriggerTrap: a mobile dongle you can use to connect your camera to your iOS or Android devices for about $35.  It’s compatible with a wide range of cameras from Canon, Nikon, and Sony to Fuji, Panasonic, and a slew of others.

Using it
TriggerTrap is straightforward to use: connect it up to your camera, choose your mode in the app and fire. You’ll have to think about how to mount your phone to your camera or tripod, but that’s a pretty easy hurdle to get over. I ended up with the ChargerCity hotshoe mount for $15. There are more expensive options out there (especially if you want to mount your phone to your tripod; something you’ll want to do if you’re working in windy conditions), but for $15 you can’t go wrong.

TriggerTrap mounted using hotshoe bracket

TriggerTrap mounted using a flash hotshoe bracket

Camera Control Functionality
TriggerTrap is not a full camera controller (it doesn’t control ISO, aperture, and so-on). Nonetheless, it does offer a wide range of functionality. Just take a look below at all the modes available in the app: you won’t be short on things to do! (the app is free, by the way, so you can download it and experiment to get a sense of the user interface):

Cable Release Modes

  • Simple Cable release*: use your phone to take a photo
  • Quick release*: TriggerTrap will take a photo when you release a button
  • Press and hold: keeps the shutter open while your hand is on a button (i.e. bulb exposure)
  • Press & Lock: a bulb exposure where you press a button to start then press the button again to stop
  • Timed Release: program the exposure time for a bulb exposure
  • Self-Timer*: set a timer and get ready for the camera to be triggered

Timelapse Modes

  • Timelapse*: a simple intervalometer. Set the exposure time on your camera and use TriggerTrap to fire the camera
  • TimeWarp*: vary the interval time between exposures to speed up and slow down motion within a sequence (think car traffic speeding up and slowing down in your timelapse)
  • Distance Lapse*: take an exposure at a specified distance
  • Star Trail: set the number of exposures, the exposure time, and the interval between exposures
  • Bulb Ramping: take day-to-night/night-to-day timelapses

Sensor Modes

  • Sound Sensor*: capture an image when a sound reaches an amplitude threshold
  • Vibration Sensor*: capture an image when a selected vibration threshold is reached
  • Motion Sensor: capture an image when a predefined number of objects move in front of the camera
  • Peekaboo*: capture an image when a predefined number of faces are detected

HDR Modes

  • LE HDR: select the number of exposures, exposure step, and the middle exposure time to shoot HDR sequences
  • LE HDR Timelapse: shoot an HDR timelapse by specifying the middle exposure time, interval time, and exposure step.

 *can be used to take images with your phone’s camera.

Some other cool stuff:
Many of TriggerTrap’s modes allow you to use one phone/tablet/etc as a master and others as a slave. For example: you can use your iPhone to trigger your camera while also triggering several speedlites.

TriggerTrap also has a handy neutral density filter calculator and simple solar calculator showing you Sunrise and Sunset times.

As an HDR trigger
TriggerTrap will work great to trigger an autobracket sequence you have programmed into your camera. It’s also a great device to allow you to take those 5,7,9+ HDR exposures. However, there’s one thing you need to keep in mind if you’re going to put your camera into Bulb mode and use TriggerTrap to set the exposure times. That thing is: every camera has a minimum bulb exposure time. A good limit is somewhere around 1/20th of a second. What this means is you won’t be able to shoot that 1/100 exposure during the day. This won’t be an issue if you’re shooting before sunrise/after sunset, but it will be an issue for you if you’re shooting during the day without a neutral density filter. While this is more of a camera limitation than a TriggerTrap limitation, it’s still something to keep in mind.

TriggerTrap for HDR

TriggerTrap used to take 7 exposure HDR

As an intervalometer
As a simple intervalometer TriggerTrap is great. It’s very intuitive to use and I like how the app uses a graphical indicator to tell you when the next exposure will be fired. For more complex intervals, you can use the Star Trail mode to dial-in the exposure time and the interval between exposures. I’d name the Star Trail mode something else as it does more than just Star Trails, but that’s not a big deal.

 I like the Time Warp and Distance Lapse modes, especially the simulation in the TimeWarp mode to give you an idea of what the acceleration and deceleration of the interval will look like.   Distance Lapse is very handy for shooting sequences in a car. The one thing I didn’t like is bulb ramping.

Bulb Ramping
As it stands, TriggerTrap’s bulb ramping exposure controls modifies exposures from the beginning of the ramp to the end of it. It would be nice if you could start a specific exposure then wait a predetermined time before ramping. From there, it would be ideal to set how long to ramp for before reaching the end ramp exposure and then continuing on at a final exposure time. It would also be nice to speed up/slow down the ramping rate if need be.

You won’t care if you won’t be using TriggerTrap to shoot Holy Grail timelapses, but this is something I would very much like to see improved in future releases.

TriggerTrap Bulb Ramping Interface

TriggerTrap Bulb Ramping Interface

Other Tidbits:
Get an iPod Touch: But everyone uses phones now! I know, but you’re going to miss your phone when you’re shooting an three-hour-long timelapse and have nothing to do but sit around and wait.   Especially if you want to use your phone to, you know, make phone calls.

Connect everything then turn on the app: I had some trouble initially getting the camera to trigger. To get it to work, I needed to first connect the camera and phone, turn up the phone volume to max then start the app.

External Battery Source: you’re going to want a battery pack for your phone if you’re planning on doing long duration timelapses. (Anker’s 3200mah battery is a good choice).  Battery packs aren’t too expensive these days, you’ll want to keep one on hand.

Should you buy it
I suspect Canon users (like me) will find TriggerTrap more compelling than Nikon users. Nikoners (Nikonites?) with their built-in intervalometers may not find TriggerTrap a need, unless features like TimeWarp, Distance Lapse, and the Sensor modes are desired creative options.

Overall, it really depends on what your expectations are. TriggerTrap is a good device at a reasonable price point. If you’re looking for a hardcore intervalometer, however, TriggerTrap may not be for you – especially with the limited bulb ramping functionality.

That said, TriggerTrap has historically been good at updating their app and adding features; it’s not inconceivable for the bulb ramping to be improved in the future. Also, in terms of user interface, TriggerTrap is easy to use and program.

Where to buy
Amazon: Dongle only (you will need a cable compatible with your camera)
Amazon: Nikon (Dongle + Cable)
TriggerTrap: Canon (Dongle+Cable)
Amazon: Charger City Phone hotshoe Mount
Amazon: Anker 3200mah external battery

San Diego: Coronado Island Pier

Coronado Island Pier San Diego Photo

An early morning shot of San Diego’s Coronado Island Pier.  I got to the Island just before sunrise to shoot the skyline.  Once I got the blue hour shot I wanted, I did what photographers usually do: ask myself “well, what else can I shoot?”

The pier was perfect. It’s a pretty small pier, and significantly smaller than the Lajolla’s. It was a bit of a squeeze to get under it, but still easy enough to work with (that’s my way of saying I didn’t bump my head).  I took off my shoes, got setup, waited for a few boats to clear on out of the frame, and shot 3 images.

Syrp Variable Neutral Density (ND) Filter Review

Syrp is one of those companies you’re happy to see succeed.  Just take a look a Syrp’s team and how they describe themselves in their contact page to get a sense of the Syrp mindset: just plain cool.  The company started with a successful kickstarter campaign to launch the ambitious, yet well-implemented, Genie Motion Control Time Lapse head.  Not being content to just stay still, though, Syrp recently introduced two new products: the Magic Carpet Slider and the Variable Neutral Density (ND) filter. 

I’ll get to the Genie and Magic Carpet Slider in upcoming posts.  Today, we’ll be looking at Syrp’s ND filter.

What is it & A little bit of background
Constant and variable ND filters have been used in astronomy, cinematography, and photography for some time.  Ask any amateur astronomer how they attenuate (i.e. reduce) the full moon’s light, and they will reach into their bag and show you a small variable neutral density filter.   Cinematographers use ND filters to allow for shallow depth of field shots during the day, and photographers use them to create a sense of motion in brightly lit scenes.  Ever lamented your inability to use a slow shutter speed to photograph a waterfall at mid-day?  You would have been able to if you had a neutral density filter.

How Neutral Density filters work
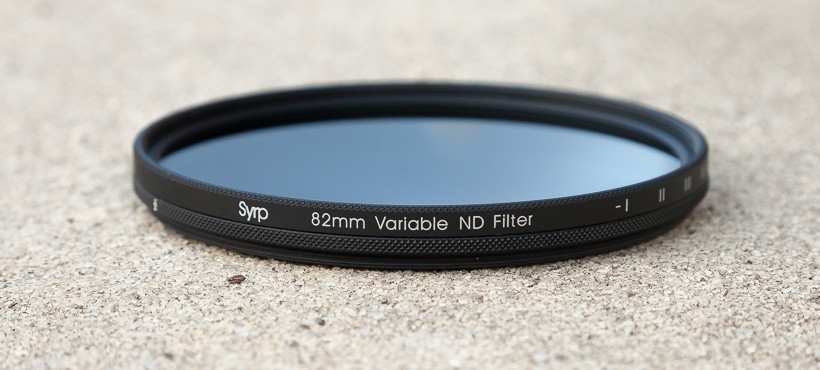
Variable NDs are comprised of  two polarizing filters stacked on top of one another.  A polarizing filter, as you may know, works by blocking incoming light at 90 degrees to the filter.  Stack two filters on top of one another at 90 degrees, and they can block out a significant amount of light.  In the case of the Syrp variable ND filter, that amount of light varies from 1 stop (i.e. ½ the light) to 8.5 stops (i.e. 17 times less light) depending on the relative angle of the two polarizers to one another.

Think of it this way: if the relative angle of the two filters is zero, you get the minimum attenuation.   Conversely, at 90 degrees, you get the maximum attenuation.  Stated simply, you turn the variable ND filter one way you get less light; turn it another, you get more light.

Variable vs Constant Neutral Density Filters
Sounds great, so why aren’t all ND filters variable?  Why do manufactures even sell constant filters?  The reason for this is making a good variable neutral density filter isn’t easy.  Variable ND’s are susceptible to color shifts.  If not done right, a variable ND’s color shift can vary widely across the rotation range.  On one end of the rotation you might get a blue-red shift, while on the other, you get a green shift.  That said, even constant (i.e. non-variable) neutral density filters, have color shifts.  But, those color shifts are, as might be expected, constant (for obvious reasons.)

Additionally, keep in mind a variable ND stacks two pieces of glass on top of one another in front of your lens.  If the materials and craftsmanship aren’t top-notch, a discernable loss of sharpness can occur- often in the corners, but also in the center of the frame.

Large Vs. Small
Syrp created two versions of the ND filter: large and small.  The small filter is 67mm and comes with step-up rings for 52mm and 58mm lenses.  The large filter is 82mm and comes with step-up rings for 72mm and 77mm lenses.  Both filters come with a sweet leather case (seriously, it’s a thing of beauty) and a cleaning cloth.  Pricing is $139 for the small filter and $189 for the large filter.

Syrp Variable Neutral Density Filter Review Photo

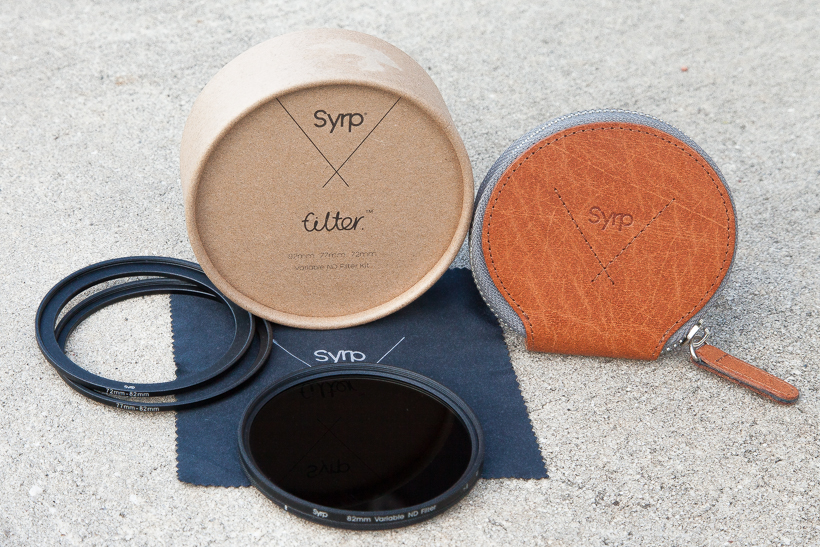
The Syrp Variable ND Filter: everything in the box

Color & Sharpness
I was impressed with the filter’s optical performance.  The Syrp Variable ND shows a consistent, and well-controlled, green color shift.  I was expecting a lot more variance out of a filter at this price range, but it wasn’t there.  Also, the shift is consistent across the rotation range and is easily correctable in Camera Raw or Lightrooom (i.e. you don’t get a blue shift on one end, and a green shift on the other).  This is a big deal, because the last thing you want to do is color-correct for every little turn of the filter you might have made during your photo session.  I also didn’t see much vingetting; that was a real surprise.

The image does get a bit softer at 8.5 stops than without the filter, but it is usable.

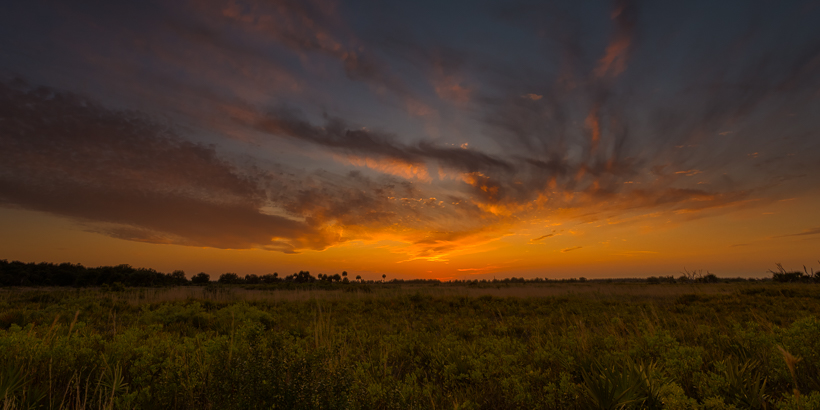
Take a look a the series of images below comparing an image taken with no filter vs images taken with the Syrp variable ND filter at various stops.  Drag the slider to see more of either image.  The last image you see in the series is a color-corrected image taken with the Syrp filter at 8.5 stops. Note: all the images were taken on a tripod within a few seconds of one another.

No Filter vs Syrp Variable ND at 1 stop
[twentytwenty]

Image taken without the Syrp ND Filter Image taken with the Syrp ND Filter at 1 stop
[/twentytwenty]

No Filter vs Syrp Variable ND at 3 stops
[twentytwenty]
Image taken without the Sypr ND filter Image taken with the Syrp ND Filter at 3 stops
[/twentytwenty]

No Filter vs Syrp Variable ND at 5 stops
[twentytwenty]
Image taken without the Syrp ND filter Image taken with the Syrp ND Filter at 5 stops
[/twentytwenty]

No Filter vs Syrp Variable ND at 8.5 stops
[twentytwenty]
Image taken without the Syrp ND Filter Image taken with the Syrp ND Filter at 8.5 stops [/twentytwenty]

Image taken with the Syrp Variable ND at 8.5 stops – quick and dirty color correction in Lightroom.

IMG_2991.Color_Corrected

Using It
The stops are clearly defined on the filter as I, II, III, IIII, IIIII, IIIIII, IIIIIII, IIIIIIII, IIIIIIII+ (the last being 8.5 stops).  I like that the stops are demarcated, but I think the single notches can be hard to read after about 5 stops.  It’s not a big deal, as I was able to tell what stop I was at.  But, part of me wonders if it wouldn’t have been easier to just use digits.

Also, while there’s a small indicator dot to line up the stop to, it’s not clear whether I should be aligning the first “I” or middle “I” to the indicator.  It would have been great to have a dot to show me where to align for a particular stop.

The stop marks and the indicator are minor quibbles.  It’s really not hard to sort out what stop you’re at.  Besides, what you’re really looking for when using an ND filter is a target shutter speed.  You’re just spinning the filter until you get to your desired shutter speed.  Do you really need to line up an indicator to a dot?  No, you don’t.

I did have a bit of stickiness with the step-up ring to my Canon 77mm lenses.  However, I never had to use a filter wrench to remove the filter.  The filter motion is smooth.

Syrp Variable ND filter review photo

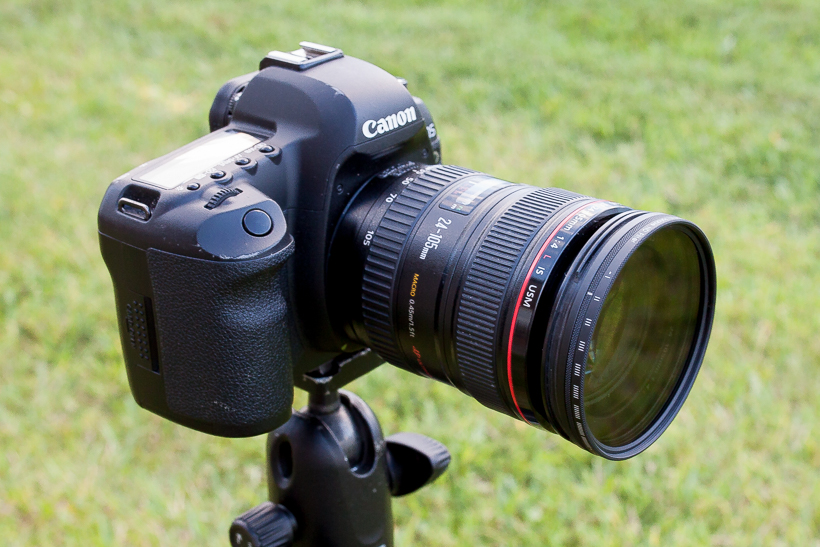
The filter mounted on my battle-scarred 24-105f/4L

Should you buy it
Some minor notes on numerals and stop indicators aside, the Syrp Variable ND filter is a strong performer.  It shows a consistent, well-controlled, and manageable color shift across the rotation range while still yielding a sharp image.  That’s a lot to pack into a sub- $200 variable ND.

At $139 for the small and $189 for the large filter, the price is well below comparable filters from B+W and Singh Ray (where you’ll be spending $300 and up).  All-in-all, you get good optical performance at a decent price.  Besides, you’ll really want that filter case!

Where to buy
B&H: Syrp ND Filter – Small
B&H: Syrp ND Filter – Large

Goodnight Prairie

Kissimmee Prairie Preserve Photo

The sun sets over Kissimmee Prairie Preserve.  This sunset had so many different looks as it unfolded ; I wish I had setup to shoot a timelapse, but I wasn’t in that mind set that night.

This is a six image HDR blended together in Photomatix using the merge to 32-bit hdr plugin.  The plugin brings the image back into Lightroom and gives you a range of light from +10 to -10 stops to play with.  One advantage of the plugin is the final image is rendered in Lightroom so you tend to avoid (or are not tempted to create) the CGI HDR look some images can have.

Kissimmee Prairie Preserve, by the way, is a 54,000 acre panther release area a couple of hours outside of Orlando.  It’s home to gators, birds, panthers, and deer – not to mention a slew of other species.  It’s also home to one of the darkest night skies in all of Florida.  I have a photo or two of the Milky Way I’ll be posting in the next week or so.